
Translated by Nick R
This is a very ancient type of pottery, not very common to hear or know about; however, a pottery style that has played a significant role in the development and advance of this old practice.
You must be wondering: what is this mysterious pottery? – We are talking about golden earthenware, and to learn more about it, we will explain everything you need to know about it below.
Table of Contents
What is lusterware?
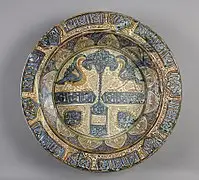
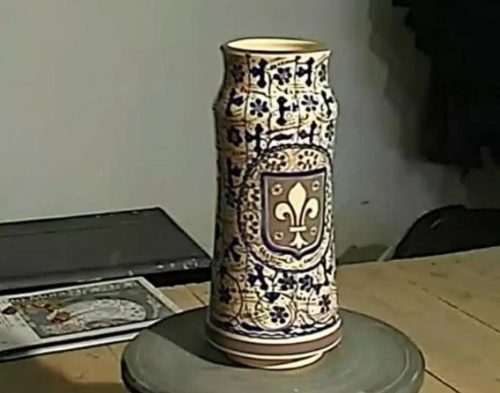
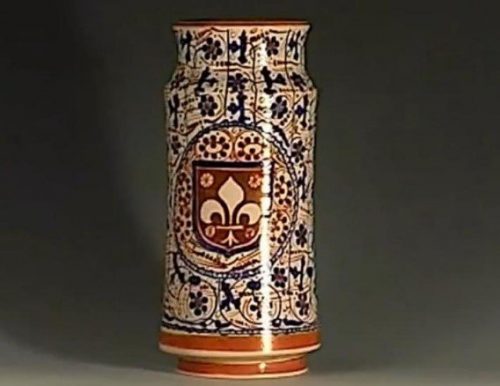
Lusterware (also known as metallic luster, golden luster, golden luster Andalusian pottery, Malika opera, or Hispano-Arabic luster) is a type of pottery known for its glazed decoration with metallic oxides that makes the piece look brighter, elegant, and in some cases, gives the effect of color-changing under natural light.
Lusterware developed and had the greatest influence in Mesopotamia, North Africa, the Iberian Peninsula, and Spain. The rest is history, and we will recount it to you now.
The history of lusterware
The earliest pieces of lusterware were made during the years of 750-1258 A.D. (especially in the 9th century) during the Abbasid Caliphate, a Muslim dynasty of the time. Ostentatious or flashy things were forbidden at that time, so lusterware replaced precious metals.
Among the places where lusterware can be found, we see the Great Mosque of Kairouan in Tunisia, North Africa. Here you can see tiles with a metallic luster.
Within the Iberian Peninsula, there are 5 places where pottery and, above all, the lusterware production stood out: Manises, Paterna, Quart, Alacuás, and Muel. It is worth pointing out that the potters of that time were the Moriscos: a Muslim community that spread throughout the places we have already mentioned.
Unfortunately, the expulsion of this population through a decree caused losing the techniques, secrets, and formulas that they used to give the metallic luster effect to the pieces.
During the 16th century, Catalonia, Toledo, Teruel, Talavera de la Reina, and Seville began to manufacture lusterware. However, although they emulated many features of this pottery, in order to make it unique and distinctive, they added details such as combining blue with green or blackish purple.
This showed that lusterware practice continued to be in force, yet with new features that allowed its style to evolve and be adopted by people at that time.
By the 18th century, Spain began to manufacture ceramics, standing out as one of the best European countries in the commercialization and elaboration of ceramics. This country also copied the basic aspects of lusterware manufacture but added new techniques.
The production of lusterware took place in the Alcora Royal Factory. Unfortunately, in the 1780s, a labor problem arose, forcing many potters to move to Manises.
A century and a half later, around 1930, this site boasted approximately 80 factories, which employed more than five thousand people and, of course, produced all kinds of ceramics, within which the lusterware always stood out.
How was lusterware made?
Like us, you might be curious about the process of elaborating lusterware. That is why we will explain it to you below.
The dough or clay
The first thing to be done was to extract the clay from nature, grind it, wash it and let it dry in the sun. Once it was ready, the piece would be modeled, which was done either by hand using modeling techniques or by using the potter’s wheel.
When the piece was in leather hardness, in other words, almost dry but still a little humid, it would be subjected to a first firing.
The glaze
After the first firing, the piece would be glazed (a process by which a layer of glaze is applied that, when fired, turns transparent and shiny), followed by a white-glazed base and decoration in cobalt blue. It would be left to dry well and exposed to a second firing.
The piece was left to cool down inside the kiln, and then it was taken out and lustered with a mixture of copper and silver sulfides dissolved in vinegar to obtain a golden metallic reflex effect. It was then fired for a third time.
Finally, the piece would be taken out of the kiln entirely cold and finished.
Lusterware in Italy
The development of lusterware played a key role in Italy. The first thing worth knowing is that this country began to imitate lusterware around the second half of the 15th century.
Two artists stood out at this time for perfectly handling the metallic luster technique. The first one was the painter Galgano de Belforte, who was one of the best and main spreaders of the metallic luster technique in Italy.
Galgano was followed by Giorgio di Pietro Andreoli, who improved the process used by Galgano and incorporated his own methods and motifs into the decoration of the pieces, including renascent motifs.
This century became the cradle of European ceramic renovation, so much so that three main achievements are attributed to it.
- The development of polychromy, that is, the incorporation of several new colors like yellow and red.
- Gold, copper, and orange colors were seen, not only in lusterware works but also, in sculptures and murals.
- The inspiration in Chinese porcelain.
How to do the metallic glaze technique?
You are probably wondering whether it is possible to do the metallic glaze technique at home or in your small workshop; the answer is yes, and today you will learn how to apply it to your ceramic pieces.
The materials you will need
- Kneading table
- Clay (of your choice)
- Potter’s wheel
- Water
- Sponge
- Pencil
- Brushes
- Ceramic kiln
- Copper sulfide
- Silver sulfide
- Vinegar
- 2 plastic containers
- Iron red oxide
- Copper oxide
- Sulfur
- Silver nitrate
- Rosemary (optional)
The step by step
Is everything ready? Now, just make sure to follow the steps in detail to make the gold lusting technique.
Step 1: to start, knead the clay very well until achieving an easy-to-handle consistence. Add just a little water if it is too hard.
Step 2: start lathing the dough on the potter’s wheel. If you don’t know how to do it, we suggest you read our blog on lathing. Remember you can make any shape you want in this step: plates, cups, bowls, vases, etc.
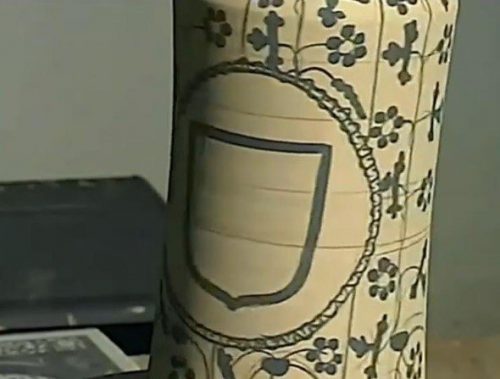
Step 3: once your piece is entirely dry, start drawing the design of your art piece.
Step 4: highlight those pencil traces, only this time with cobalt blue paint. You can help yourself with a paintbrush.
Step 5: let the paint dry very well and put the piece in the kiln. The firing temperature has to be 1020 ºC.
Step 6: grind and strain the copper and silver sulfide. Once they are finely powdered, mix them with vinegar until you get a totally liquid mixture similar in texture to paint.
The amount of mixture you make depends on the size of your piece, as you will apply it later.
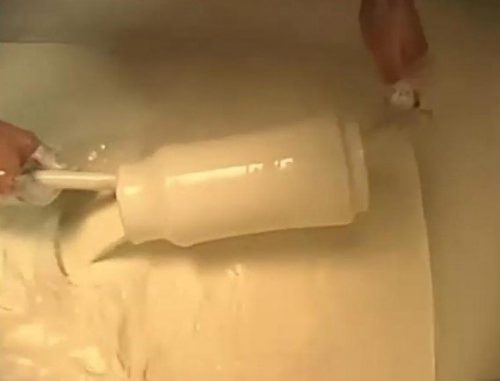
Step 7: once the piece has cooled in the kiln, take it out and apply two coats of the previous mixture to the object with a soft bristle brush or paintbrush.
If the amount of mixture allows to sink the piece in it, do it.
Step 8: after applying the mixture, you will see that the design was completely covered, so don’t worry because you are on the right track. Now let the layers dry very well.
Step 9: once the piece is dry, take it back to the kiln and fire it at 960 ºC. Remember that you must let your piece cool down in the kiln; it may crack if you take it out while hot.
Step 10: at the moment you take the piece out of the kiln, you will see that the mixture layer has disappeared completely, as the ceramic has absorbed it, leaving the initial design visible again.
Step 11: soak the sponge in water and squeeze it out very well, and then wipe it over the piece to clean any imperfections.
Step 12: mix small quantities of red iron oxide, copper oxide, silver nitrate, and vinegar in a plastic container. The resulting substance will give a metallic glaze effect on the piece.
Step 13: with a small thin brush start further decorating the piece. Keep in mind that these decorations are the ones to be displayed in metallic color, so play with your imagination.
Step 14: again, let the piece dry very well.
Step 15: fire your piece one more time. This time the temperature should be 500ºC. Moreover, if your kiln is homemade or gas, we advise you to use rosemary as fuel since thanks to its natural components, it enhances the metallic luster effect.
Step 16: let your piece cool inside the kiln and then remove it.
Step 17: wet and wring out your sponge again, and then wipe it all over the piece to clean stains, dirt, or any other imperfections.
Step 18: after you finish cleaning, you will see a metallic glaze reflection on your piece. This means it’s ready. Great, isn’t it?
Where to see lusterware pottery?
And as we know you enjoyed learning about lusterware and that you would like to see genuine pieces from years past but don’t know where to go, we have excellent news for you!
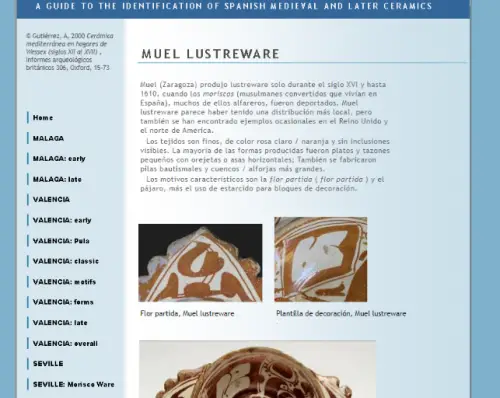
There is a place that is not physical and, best of all, totally free, where you can see lots of pieces from different periods made with the metallic glaze technique.
This website’s name is MUEL and in it, you will be able to appreciate various Spanish pieces from Malaga, Valencia, and Seville, all of them featuring metallic luster dating from the Middle Ages to the eighteenth century. Most of these objects were found in archaeological excavations.
So far, we have reached the end of this blog; we hope you liked it, learned, and, above all, that you feel encouraged to try the metallic glaze technique over your pieces.
If you are interested in trying other decoration techniques, we invite you to keep learning with the following recommendations:
- Ancient decoration techniques
- Decoration techniques for raw clay
- Decoration techniques for modifying ceramics
Enjoy and continue to bring out your artistic hints.

