One of the favorite pieces of all potters, ceramists, and lovers of ceramics are vases or flower vases. These objects are great for decorating any corner of the house.
Nowadays there are many models of vases of all sizes, shapes, and colors. Today we are going to show you how to make the traditional vases that every potter makes in their early days as an artist.
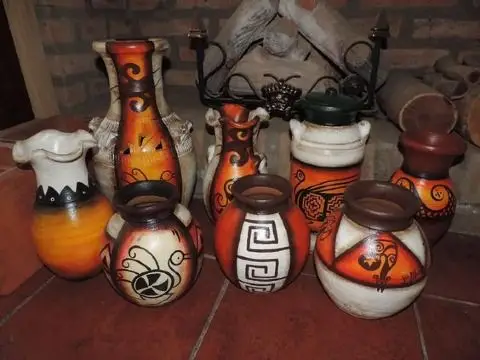
Table of Contents
Make a vase on a potter’s wheel
First, we want to show you how to make your vases with a potter’s wheel.
Materials
- Clay
- Potter’s wheel
- Water
- Kneading table
- Ceramic glazes or engobes
- Paintbrush
- Sponge
- Laina or spatula
- Cutting wire
The step by step
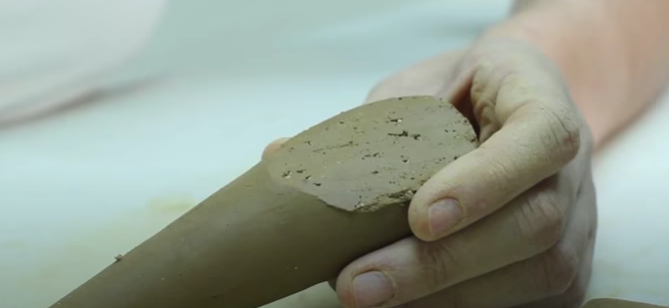
- The first step is to prepare and knead the dough well. To do this, the dough is moistened and kneaded until no more bubbles can be seen.
- Use your sponge to moisten the dough. Also, moisten the potter’s wheel; otherwise, the material will stick to it.
- Place the previously kneaded piece of dough on the wheel of the lathe.
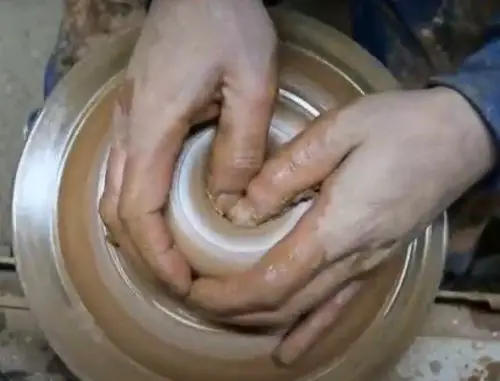
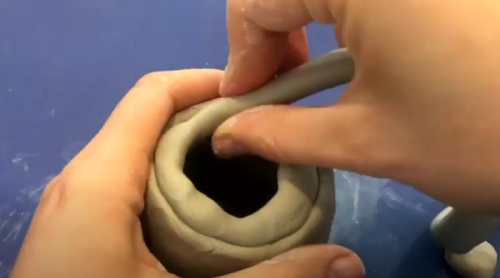
- Start spinning the potter’s wheel and modeling the shape of your figure. To make this step easier, wrap your hands around the dough and form a cylinder with both hands. Make sure this cylinder is the size you want your vase to be.
- To create the hole in the center of the cylinder, press down on the center of the mass with both thumbs. As the hole gets bigger, use your other fingers to shape the figure into a vase, both inside and outside the figure. This cylinder is initially the basis for your figure. The walls of your piece should not be too thick.
- If cracks or imperfections form on your piece, you can use a spatula to remove the clay residue and improve the shape of your vase.
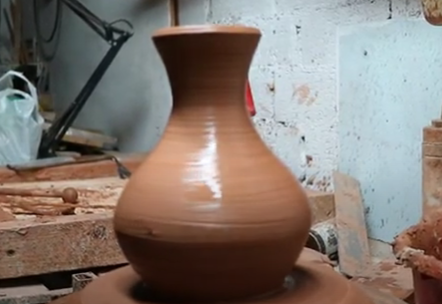
- Once the vase has reached its final shape, you can stop the potter’s wheel. Use the cutting wire to cut off the base of your figure, i.e. separate your piece from the lathe.
- Move the vase carefully and don’t apply too much pressure with your fingers, otherwise, there could be imprints. Now let the figure dry. This drying process can take between 3 and 5 days.
- Place your vase in the kiln to fire. Remember that when using clay such as porcelain, stoneware, or refractory you should fire between 1250ºC and 1300ºC. We also recommend that you check with your supplier before purchasing your clay to determine the temperature and time it should be fired at.
- Allow your clay to cool in the kiln and then take it out.
- Decorate your piece as you wish, using the various engobe decoration techniques.
- Let your workpiece dry completely and your vase is ready.
Model your vase using the chorizo and pinch technique
The second method on how to make your own ceramic vases is the ¨sausage¨or coiling and pinching modeling technique.
Before we begin each step, let’s remember what these two techniques consist of. For one thing, the chorizo technique, as the name suggests, consists of making chorizos (sausages or cylinders) that are assembled into the desired shape. With the pinching technique, on the other hand, an object is formed by pinching with the fingers and hands.
Materials
- Clay
- Putty
- Sponge
- Water
- Ceramic kiln
- Potter’s wheel
- Laina or spatula
- Wooden Trowel
- Ceramic glazes or engobes
- Paintbrushes
The step by step
- First, you have to knead the plasticine well, you can also add some water.
- When the clay is ready, roll it into a small ball, being careful not to crack it.
- Start punching a hole in your clay ball with your thumb. With the other hand, spin the ball.
- Turn the dough over and pinch the edges to shape the base. This bottom should be in the shape of a deep plate. The edge of the floor should be the same thickness.
- In steps 3 and 4 you need to be careful not to puncture your clay and that there are no cracks. If you spot any irregularities, rub them out with your thumb.
- Form a sausage with another piece of clay. This sausage should be the same thickness as the wall of your floor.
- Now place the sausage on the edge of the base so that the ends of your coils should meet.
- Place your thumb on the inside of the object and the remaining fingers on the outside. Then flatten with your fingers, meaning you connect your sausage to the bottom. Do this until the figure is smooth with no cracks or lumps.
- Smooth the piece with your thumb until it connects well and has no bumps.
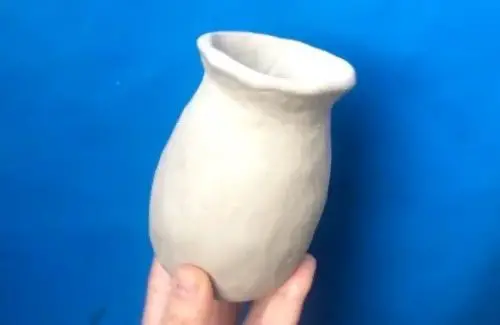
- Repeat the steps until your vase is the desired height. Just note that towards the top, the sausages should be placed a little more towards the center of the vase to give your piece the shape of a traditional vase.
- If you feel your clay is drying out during this process and you are unable to handle it well, use your wet sponge.
- When you reach the end of the vase opening, you should place the last coil to be added towards the rim, i.e. some of the coils should remain outside the rim along the outer walls of your piece.
- Use a wooden stick to connect the two parts.
- Stroke the sponge soaked in water over your workpiece again, especially the opening of the vase, so that it is completely smooth.
- Let the vase dry.
- Fire the vase at the temperature and duration specified by your clay supplier.
- Let your piece cool in the oven and then take it out.
- Paint and decorate your vase as you like and let it dry well.
Create your own tripod vase
The third and last method is very similar to the previous one because here too you must use the techniques of chorizo and pinching. However, the process takes a little longer as this vase has multiple parts.
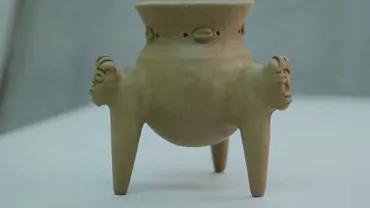
What is a tripod vase?
A three-legged vase has three supports that hold the vase. Tripod vases have been around since 300 BC. This type of pieces has a cultural background, having been used as objects in burial rituals by pre-Columbian peoples who inhabited the central Caribbean of Costa Rica.
Materials
- Clay
- Kneading table
- Sponge
- Water
- Pottery kiln
- Lathing table
- Liquid barbotine
Step by step
- 1. Form 3 sausages of the same thickness with a length of approx. 50 cm and another sausage of 30 cm from several well-kneaded pieces of clay.
- 2. Take one of the longer sausages and start rolling it up, i.e. coiling up like a snake, and then join another sausage into a roll.
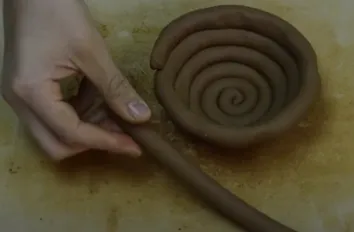
- 3. When you’ve finished this roll, assemble your piece to form the base for your vase. You can do this with your fingers by running them up and down the inside and outside of the figure. Do this until the dough is in the shape of a bowl or deep cup.
- 4. Make sure there are no more cracks.
- 5. Take another long sausage and roll it up again. This part should be longer than the bottom as this piece of dough will form the neck of the vase. When doing this, this neck should be the same thickness as the base you made earlier.
- 6. Now start making this smooth piece. Help yourself with your fingers, slide them up and down, in and out. Care should be taken that this neck is not straight, but falls down the middle, like the neck of a vase or flower vase.
- 7. Again, make sure there are no cracks or imperfections.
- 8. Allow these two parts, the base and the neck of your vase, to dry very well.
- 9. If your clay dries out and you feel like you can no longer handle it well, we recommend dipping your sponge in water, wringing it out, and then wiping it over your workpiece so you can continue modeling your vase.
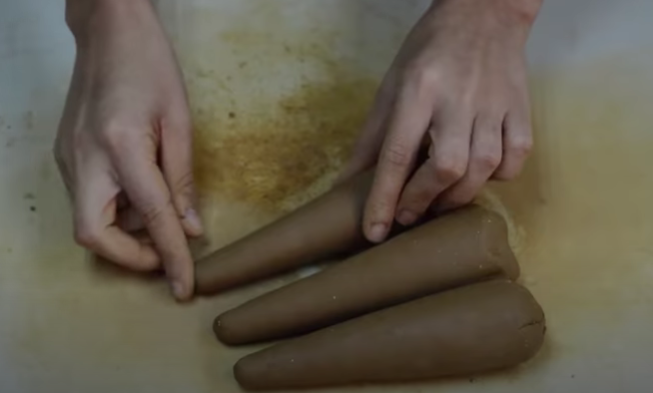
- 10. Select three more pieces of clay and shape them into 3 cylindrical chorizos. These are in the shape of an elongated, inverted cone. These will be the supports for the vase.
- 11. Then, using 3 more pieces of dough, form 3 silhouettes of a human face.
- 12. To these silhouettes, you add the shape of the eyes, nose, mouth, and hair.
- 13. On each support, make small strokes the size of the human faces you made; use a pointed tool. These strokes should be made on one side of the thickest part.
- 14. Apply liquid slip to these lines and glue the surfaces together with light pressure, but without deforming either part.
- 15. Once the pieces are glued, you’ll notice that there are seams in the middle of the faces and the supports. So add a small piece of dough on each side and spread with your fingers to connect everything and remove the joint you can see between the faces and the supports.
- 16. Add small embellishments to the collar you made in steps 5 and 6. These details are very easy to create. Make several very small ovals and glue them horizontally down the center of the collar in a straight line. Remember that these ovals must blend into each other, i.e. glue one of them with liquid slip and make a horizontal line on it and a small hole on either side of it. Then do the same with the others, leaving a distance of 2 to 3 cm between them.
- 17. Remember the base and neck you made in the beginning? Now draw small horizontal strokes on the edge of the mouth of your base. Repeat this process on the edge of your figure’s neck that will be glued to the base.
- 16. Apply liquid slip to the edges where you made the strokes and join these two pieces together. With this step, you have formed the body of your vase.
- 18. Let this connection dry for a day.
- 19. When the object is dry, use your thumb to begin removing the dividing line between the two parts.
- 20. Make a sausage that is not too thick and place it in the space that remains between the two parts.
- 21. Flatten the sausage with your fingers and rub this piece of clay up and down until the inside is smooth with no lumps.
- 22. Repeat the previous two steps, but this time on the outside.
- 23. Make a horizontal slit in the thickest part of each support, just behind where the faces will be glued. This cut should remove a quarter of the clay on this side of the supports. Follow the image below.
- 24. Draw the horizontal lines where you made the cuts and also where you will glue them, i.e. slightly below where the bottom and neck of the vase connect. In doing so, two of these supports should be attached to one side and the other to the front, as if forming a triangle.
- 25. Glue these pieces together and to eliminate the separations between the supports and your vase, make three small chorizos around them. To glue these parts, we advise you to turn your vase upside down. That will make it a lot easier.
- 26. Arrange the chorizos around the division and use your fingers to spread the clay towards the vase and base to eliminate this imperfection and until the mass is smooth.
- 27. When your piece is dry and ready, slide it into the kiln to fire. Keep in mind that the temperature and duration will depend on the type of clay used.
- 28. Let your vase cool in the oven and then take it out.
- 29. Normally these pieces are not decorated but left in their natural clay color. You have now created your own three-legged vase.