Translated by Nick R
Probably, if you are interested in the ceramic world, you have already heard about concepts such as lathing or centering. However, you are probably wondering: what is that? And how on earth am I going to do it? Well, just relax because we will solve your doubts here.
First, you should know that the processes of lathing and centering are really popular and significant in the world of ceramics and are practiced by potters worldwide. Through these processes, several pieces are made on the tool par excellence of any potter, the potter’s wheel.
And if you want to learn how to lathe like a pro, you are in the right place. But first, you should be aware that turning is a long process, which takes lots of practice, patience, concentration, and inner work. Yes, we know it may sound hard, but don’t be scared! Today we will teach you how to lathe in 3 simple steps.
Table of Contents
Materials that you need
Before starting to explain the step-by-step, it is necessary that you have with you the following list of materials in order to lathe.
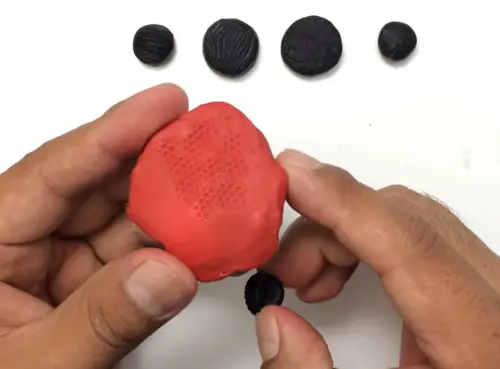
- Clay (the one you want to work with)
- Potter’s wheel or lathe
- Lathing tools
- Water
- Trowel or spatula
- Sponge
- Plastic container
- Kneading table
If you are a beginner, we advise you to use an electric lathe, for it will be easier to learn with this type of tool. We talked about it in-depth in our blog about types of lathes and how to choose yours. Also, if you don’t know what type of potter’s wheel you should buy, we invite you to read our top 10 electric potter’s wheels where we guide you through the best options, including their prices according to your needs.
1. Preparation of the clay
Long before putting your clay on the wheel, there is one thing you must do which is to prepare the clay. Your dough must be very well prepared because centering and modeling depends on it.
That is why we will show you how to do it below.
Step by step
Step 1: Normally, the clay comes in a hard square, so cut the piece and the amount you think you will need for your figure.
Step 2: Once cut, make a ball and lay it on your kneading table. Keep in mind that the table should be made of metal or wood so that the clay slides well and does not stick to it.
Step 3: Begin kneading the dough vigorously. Do it from the inside out, similar to when you knead the dough for making bread or pizza.
A tip for you is that if you see the dough is too hard, you can moisten it with a sponge. Wet the sponge, squeeze it out in the plastic container, pass it through the clay, and continue kneading the dough.
Step 4: Knead the clay until no air bubbles are left.
Step 5: Roll it back into a ball. For this, hit the dough hard with one hand while turning it with the other.
Step 6: At this point, you will feel that your dough is in the right state to be easily shaped.
Remember that the appropriate point of the dough is when it feels soft but not too much because if you leave it too soft or wet, it can lose its resistance at the moment of lifting the piece from the lathe.
Hand parts and their functions
As you read in the title, every part of the hand has a specific function when centering and lathing. You must be aware before learning how to perform the following two processes. Read on!
Lower palm (1)
This part of the hand plays a fundamental role in the dough centering process. With this part, you can apply pressure downwards and to the center. That will allow you to have better control over the dough as it rotates, and thus keeping it centered won’t be a problem.
Knuckles (2)
With your hands’ knuckles, you can perform one of the most essential tasks when forming a figure while turning.
The knuckles enable you to lift the walls of your work. To do it well, you have to apply pressure to the dough, bringing it towards the center. This pressure has to be done mainly with the index finger knuckles while trying to close your fist.
Finger tips (3)
Your fingertips have a specific and crucial task. With this part of your hands, you can shape your clay as you like while it is spinning.
Normally, this step is done after you have formed the sides with your knuckles. To do this process, make sure to put pressure with your fingertips, but not so hard, or you might break or go through the piece walls with your fingers.
The entire thumb (4)
The whole thumb, from the bottom to the tip, is used to keep the top of the piece firm and even.
In addition, with this finger, you can also curve and level the edges. The only thing you have to do for so is to apply moderate downward pressure.
The thumbs (5)
The thumbs are mainly used to form the piece and make its opening hole.
Opening these holes is very simple, you just have to place your fingers on the piece and press down while it rotates, you will see how the hole opens little by little.
The hand palm (6)
This part of your hands is employed to put pressure on the workpiece, either downwards or towards the center.
Your palms allow you to keep the piece formed or flatten it in the case you want to make pieces such as plates.
2. How to center
Now that you know the function of each part of your hands, the correct dough preparation, and the materials you need for centering and lathing is time for you to learn how to center the dough.
What is centering?
Centering is the process by which potters make sure to put the clay right in the middle of the potter’s wheel. It may sound easy and too obvious, but you should know that centering the clay is, actually, quite crucial for a successful lathe turning.
Step by step
Step 1: You will use the dough you prepared before for the centering. Remember, it should have a ball shape, so what you have to do is form a sort of cone. It doesn’t have to be perfect, only have a flat base.
Step 2: Wet your sponge and squeeze it into the plastic container.
Step 3: Slowly turn your wheel and place the sponge that you squeezed out right in the middle of the lathing wheel. The wheel will start to get wet, which keeps the clay from sticking to the wheel.
Step 4: Stop the wheel and throw the dough onto the plate forcefully, making sure that the straight side points downwards. Try to make it fall in the center.
Step 5: Do not panic if the clay does not fall in the center, just drag it until it gets to the center.
The clay should not easily slide when dragging it to the center because it means that your lathe is too wet. If that happens, remove the excess moisture with a dry sponge.
If, on the contrary, you have to make a little effort to move it, it means that your lathe has the right humidity level.
Step 6: Spin the wheel again, keeping your palms pressed completely against the dough to prevent it from moving again from the center.
Start spinning the wheel at maximum speed, and as the dough is centered, lower it to normal.
Step 7: Press the dough towards the center using your palms and fingers. Add water to the dough to keep it soft and easy to turn.
For adding water, just wet your sponge and squeeze it slightly over your clay. Repeat as many times as necessary until your dough is smooth yet not runny.
Step 8: Hold it steady using your palms to add pressure to the clay.
Step 9: About 2 minutes after you do the previous step, placing your hands around, make the dough go up and down for about a minute. Past this time, you will see that you no longer have to put pressure on it to make it go up or down; it will start to do it by itself.
Be very careful not to let the clay slip off the wheel or stretch so much that you cannot handle it. Always be in control with your hands.
In the event that your clay does come off the wheel while centering it, don’t stick it back to the plate, but set it aside to be recycled and start over with a new piece of dough.
Another point that is of utmost importance for you to know is that if, while turning, you mistakenly press too hard on the top of the dough as it rises, a piece will break off. Do not reattach this piece either, but keep it aside to recycle it and continue working with the clay you still have on the wheel.
Step 10: To finish centering, bring the dough down so it stays still and does not get deformed when you take your hands off.
Step 11: As the clay gets to a point where you can handle it without so much effort, just by applying some pressure and keeping it under control, and it stays still when you take your hands off, it means it is ready for turning into the initial figure: the cylinder.
At this point, there is no need to turn off the lathe as you will use it to form your cylinder. Remember that the lathing wheel should be spinning at a regular speed all the time.
Tips for centering the dough
As we told you before, we will teach you how to lathe a cylinder, however, first we would like to give you some tips for you to center your dough correctly.
Body posture
- Your back, shoulders, and neck must be rigid.
- Your arms must be close to your body and your elbows at the beginning of your legs, that is, on your hips, to avoid getting tired in the same position.
- Make sure your body is right in front and level with the lathe, which will help you to be more stable.
- Your hands always should be positioned to hold the walls of the clay, therefore, you can have better control over it and exert pressure whenever you see it necessary.
- One of your hands must be completely still and holding the dough for stability, while the other one can be available to be freely lifted or moved to allow you to model or reach the tools you need in the process.
Time and speed
You had better not spend too much time centering the clay because the following lathing process will take a long time, and you will get tired. We advise you to spend about 10 minutes centering the dough; however, if you are yet learning, it will take longer, so work at your own pace, with no pressure.
At the beginning of the centering, the lathe speed has to be normal, then fast, and as you center and knead the dough on the wheel, it should be slowed down little by little. That is really essential for you will have better handling of the clay, and you will be able to start raising your piece’s walls.
Inner work
Even though it may sound strange, ceramics, like any other art form, requires internal work from the person working on their creations. But what do we mean when we talk about inner work?
The inner work involves that you, as an artist, potter, or ceramist, either beginner or expert, must be aware not everything in ceramics has to be perfect. It is reasonable that you may make mistakes and therefore have to start all over again.
What is most important is to know that you can make mistakes and learn from them. That leads us to assure you that, as you improve, you will be more aware of every step so as to achieve what you have planned.
Our advice to you is to be really patient and willing to learn at your own pace. Remember, Rome was not built in a day.
3. How to lathe a cylinder
As we said before, the first thing to do after centering the dough is to make the starting form; a cylinder. But why a cylinder?
A cylinder is the perfect geometric figure to start a ceramic piece. Thanks to the cylinder shape, you will be able to determine the height, thickness, and shape you wish for the figure from the very beginning.
Moreover, once you have learned how to form your cylinder correctly, the rest is a piece of cake.
Step by step
At first, forming a cylinder can be a little complicated, especially the first time, but relax. Follow our instructions, and we promise you will succeed.
Step 1: Once the clay is centered, wrap it with your hands while the wheel is spinning at regular speed.
Step 2: Keep your hands steady and find the center of your dough.
Step 3: Knowing where the center is, place your thumbs on top and press against the dough. Do this while you continue to press lightly with your palms to keep the dough stable.
Remember, if the dough dries out, you can squeeze your sponge right on top of the dough to wet it a little. However, stop pressing the dough before wetting it, or you may damage it.
Step 4: Continue dipping your thumbs, and, gradually, you will see how a hole opens up in the center of the dough.
Step 5: The initial hole should be narrow and deep, about the size of your thumbs.
Step 6: Once you can fit both thumbs into the hole, do it, then roll your hands so that this time your palms are over the edges and your other fingers are around the outer sides, like in the following image.
Step 7: Keep pulling down your fingers as far as you feel you will not pierce the base of your figure.
In order to find out how much you can continue lowering without piercing the base, we advise you to stop the lathe and introduce a needle to determine how far you can continue and get the thickness you desire.
However, this may take a long time as you would have to stop over and over again; therefore, you could start to develop the ability to feel how far to go down.
Step 8: If you notice an excess of clay or water inside the hole, you can gently poke the sponge into it to remove any excess and, in the process, see how it is going.
Step 9: Start expanding the opening further using your index fingertip. It should be done while holding, with the other hand, the outer part of the wall that you are pushing with your index finger.
Step 10: Do step 9 on any side of your figure until you see that the hole has become big enough.
Step 11: It’s time to stretch the walls. To do so, place your index and ring fingers on the inside of the hole and the thumb right in front of them, but on the outside, reaching the figure base. Press the thumb with your other hand’s fingers.
Step 12: Start lifting both the inside fingers and the thumb. Do it slowly and while applying pressure to bring the walls up little by little.
Careful not to pinch when you reach the top edge of the walls, or you may damage your workpiece.
Step 13: As you go up and open up, you may notice that you can fit more fingers in the hole. So if you only put two fingers in at first, now you can insert the third one. That will give you more control over the dough.
Step 14: Continue to open and raise the walls without losing the pressure. Do this until you get the desired thickness and height for your cylinder.
Step 15: At this point, the cylinder has been formed. Now, look for blemishes, like excess water or clay, and if so, run your fingers over to fix them, but not press on them.
You can help yourself also with a trowel or scraper by passing it over the outer part of the walls and leaving your cylinder completely smooth.
Other common imperfections are slight sags or, on the contrary, protruding areas, which make the cylinder look uneven. Fixing them is easy; for dips, push outwards from the inside with your fingers; and for protruding areas, push inwards.
It is fundamental that when doing this, you press on the opposite side with your other hand to keep it straight and not to have the reverse effect.
Step 16: You may find a lot more clay on the edges, so you can remove it by rubbing the sponge through the opening of the cylinder.
Step 17: Ensure that no water has been left inside the cylinder; if so, carefully insert the sponge to soak up the liquid.
If you can’t reach the bottom, poke a thin wooden stick into the sponge and introduce it through the hole.
Step 18: When the cylinder is ready and without any imperfections, make the lathe turn very slowly.
Step 19: Take the cutting wire and hold it by wrapping it around your index fingers and pressing it against your ring fingers to keep it straight and tempered.
Step 20: Press your thumbs against the wire and the wire against the wheel. Then slide it slowly underneath your cylinder. Remember that the thread must be very close to the wheel.
Step 21: Make the lathing plate stop spinning, and carefully wrap your hands around the cylinder to lift it without digging or pressing. Finally, set it aside on a wooden or metal base.
If you want immediately to use the cylinder to form a piece, there is no need to cut it or lift it from the wheel. But if you plan to use it the next day, don’t forget to moisten it by spraying water on it, so it does not dry out and you can use it later. So that’s it, this way you will make a cylinder base for your work. Super easy!
Before saying goodbye and now that you have mastered centering and lathing, we would like to invite you to perfect your techniques by learning how to make 4 items that can be built on your potter’s wheel.
So, that will be all for today. We hope you have enjoyed this tutorial on how to use the lathe and, above all, that you have learned a lot. Be sure to keep practicing; at first, it may be a little difficult, but be patient, and you will see yourself succeeding.