Translated by Nick R
If you are in the world of pottery or just starting out, you will know that the process of ceramic firing is one fundamental part when it comes to making clay pieces.
For you to understand very well what this essential process consists of, today, we will tell you everything you need to know about ceramic firing. You will see how, after this, you will be able to fire your clay pieces like a professional.
Table of Contents
What is ceramic firing?
To begin with, you need to know what ceramic firing is, and it is actually quite simple. Ceramic firing is the process by which clay modeled pieces are subjected to high temperatures caused by fire. These temperatures cause the dough to fully harden and stop being raw enough to start painting or decorating it.
Ceramic firing fuels
Now that you know the definition of “ceramic firing”, it is time for you to learn what fuels are and what their function is within the ceramic firing process.
What are fuels?
Fuels are the natural materials used to light a fire in ceramic kilns and, therefore, fire the clay pieces. Know that some fuels are used to modify the appearance of ceramic pieces, at times changing their color or adding a different texture.
Types of fuels
Currently, there are several types of fuels, and here is a list of the fuels used in ceramic firing.
- Newspaper
- Sawdust
- Rice husks
- Mango leaves
- Natural gas
- Firewood
- Charcoal
- Salt
- Banana peels
- Wood
Types of firing
Just as there are different types of fuels, there are several types of ceramic firing. Today we will talk about 6 of them; some are well known while others are not.
Raku firing
Raku firing originates directly inJapan and Korea, where it was developed as a firing technique for the type of clay of the same name. The expression ‘Raku’ means fun or happiness.
This type of firing is very famous and well known, especially in Asian countries. In addition, you should know that, although raku firing bakes the pieces (clearly), it is more of a decorative technique as it gives the art pieces a touch that differentiates them from others, and you will see it in a while.
The step-by-step process of raku firing
Here are the step-by-step instructions for this type of baking.
Step 1: cook your piece at 1000 °C for 30 minutes.
Step 2: let the pieces cool down in the kiln to prevent them from breaking or cracking, and then take them out.
Step 3: paint the pieces with a ceramic glaze of your preferred color and allow them to dry thoroughly.
Step 4: fire the pieces at 900 °C for 20 minutes.
Step 5: add sawdust to the kiln and leave the pieces for about 3 minutes.
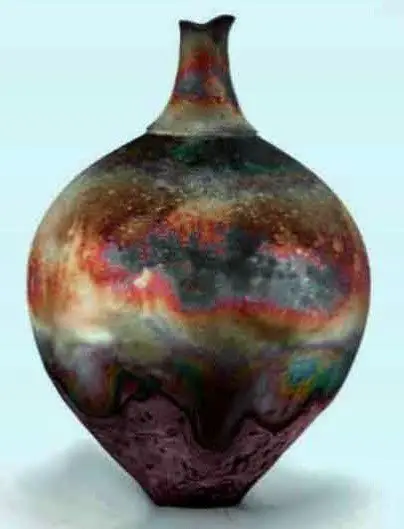
Step 6: after 3 minutes, remove the pieces with a pair of tongs. Here you will notice how the temperature change impacted the pieces, causing a crackle effect on the glaze, also produced by the fuel used, i.e. the sawdust.
Besides this effect, and as the pieces return to ambient temperature, you can see a rainbow effect on them, which makes this type of firing very fun and unique.
Step 7: wash the pieces with water and a clean, soft sponge to remove blemishes.
Step 8: leave the pieces in a cool place away from the sun or rain. And that’s it: you now have your pieces cooked in raku firing.
Pit and shed firing
There are two ways to make this type of firing, in a pit or in a shed or kiln. To clarify, a shed is a kind of box made entirely of refractory material with a lid in which fuels and clay pieces can be introduced to be fired.
Either way, the pieces must be surrounded by the following fuels: sawdust, salt, and baking soda to obtain the desired effect.
The step-by-step process of pit firing
Step 1: open a hole in the ground, which should be big enough to fit all the pieces you are firing, and add the fuels between them so that they do not stick to each other.
Step 2: put the pieces and the fuels to be added between them into the hole. Make sure that the fuel covers the pieces completely. If they are hollow, leave their openings protruding at the top so that no material falls into them.

Step 3: set fire to the fuels.
Step 4: cover the hole completely with a metal lid or any refractory material.
Step 5: let the pieces bake for at least 5 hours at a temperature of 1300 °C. In this case, to check the temperature, we recommend using a pyrometer. This tool should be inserted through a hole, and it will indicate the temperature at which your pieces are.
Step 6: once the time has passed, carefully uncover the pit and remove the pieces with tweezers.
Step 7: to finish, wash the pieces with plenty of water and remove any fuel traces with a sponge.
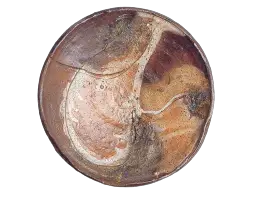
The result will be different from the usual firing process, as the pieces will be gray and brown, and a few stains on the walls.
The step-by-step process of kiln or oven firing
Let’s continue with the second way to do this type of firing; in a pit or kiln.
However, before we begin to explain the step-by-step, we would like you to remember that the results of this firing are the same regardless of the kiln, so you can choose the one you like the most and which is easier for you to do.
Step 1: in a hut or kiln, place the pieces and the fuels to be burned. Remember that the art pieces must be well separated and covered by the fuels.
Step 2: set the fuels on fire.
Step 3: cover the hut with its refractory lid or close the kiln. In this step, make sure that it is well sealed and without air leakage, this way the results will be better.
If you are doing this process with a hut, cover the edges with clay so that it gets a good seal.
Step 4: let the pieces bake for 3 to 5 hours at a temperature of 1300 °C.
Step 5: once the oven or hut has cooled, uncover it and remove the pieces.
Step 6: now, wash the pieces with water and a sponge. And that’s it, we are sure the results will surprise you.

Sawdust firing
This is one of the easiest firing methods, although similar to the previous one. You must already imagine by its name what kind of fuel we will use, that’s right, sawdust or also known as wood sawdust.
The step-by-step process of sawdust firing
Step 1: in your kiln, put enough sawdust to form a base 10 to 15 cm high.
Step 2: now, place the pieces over this base. They should not be joined together.
Step 3: completely cover the pieces with sawdust.
Step 4: set fire to the sawdust. Let these pieces bake for 5 hours at low temperatures, between 600 and 900 °C.
Step 5: let the kiln and the pieces cool down entirely; otherwise, they may break if you take them out while still hot.
Step 6: remove the pieces from the kiln and wash them with water and a clean sponge to remove any defects.
Step 7: leave the items in a cool place away from humidity and sunlight.
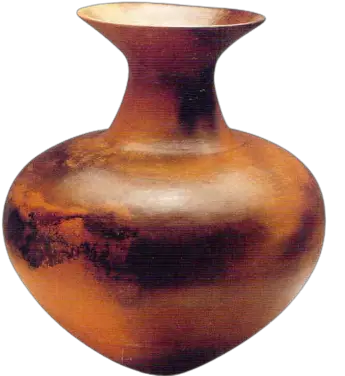
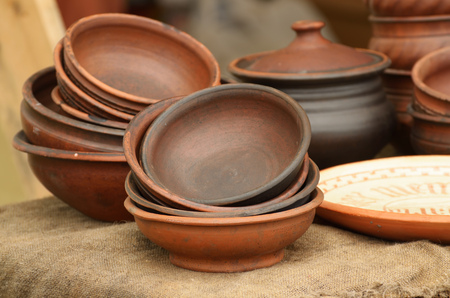
At this point, you will have your sawdust fired pieces ready. The result will be ceramic ware with a reddish-orange color and dark pieces. Something beautiful!
Smoke firing
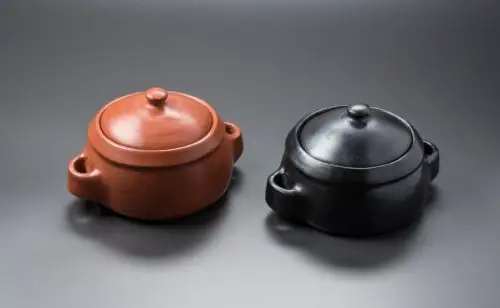
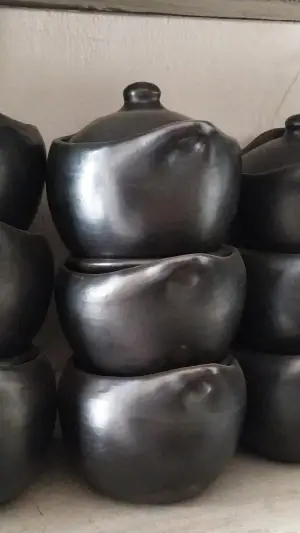
The next type of ceramic firing is smoking, which is also a decoration technique for after firing as the clay changes its color to an opaque or shiny black.
This technique is well known in certain regions of Colombia, particularly where people are dedicated to ceramics manufacturing. This is where the famous black pottery called Ceramica Chamba is produced.
The step-by-step process of smoke firing
You surely want to know how to make a ceramic piece totally black.
But, before starting our explanation, we would like to clarify that only newspaper, rice husks, mango leaves, and, occasionally, sawdust are used for fuel in the smoking process.
Step 1: put the fuel to be used in the kiln.
Keep in mind that, if you want the pieces to turn brown, you must introduce the fuel slowly. This can be achieved by using a homemade kiln because it allows us to see how the fuel burns in the bottom part of the kiln.
Otherwise, if you have an electric kiln that does not allow you to see this process, you must put 3 to 4 lumps of fuel. Each one of these lumps should be the size of two soccer balls.
On the other hand, if what you are waiting for is to get black pieces, the only thing to do is put into the kiln between 5 and 6 fuel lumps; the same size and quantity that we indicated before.
Step 2: put the pieces in the kiln. They must not be next to each other.
Step 3: leave your pieces for about 4 hours at a temperature of 900 °C.
Step 4: once the time has passed, let the pieces cool inside the kiln.
Step 5: once the pieces are ready, take them out. You will notice that they already have the color you intended from the beginning.
Step 6: next, wash it very well with water and a clean sponge to remove any blemishes.
Step 7: finally, place your piece in a cold, humidity-free place.
Firewood firing
Firing with firewood is also one of the oldest and best-known techniques for firing ceramics. In this technique, the ashes that come out of the firewood play the main role; they are the ones that provide a different effect to the pieces.
You may need to know that this way of firing ceramics is very tiring, as firewood is much hotter and heavier than the other fuels we have mentioned: it requires considerable physical effort to perform the firing process.
The step-by-step process of firewood firing
Step 1: fill the lower part of the kiln with firewood; it must be thin enough to burn well. Also, it has to form a big lump, about the size of a 30 cm mountain.
Step 2: put your pieces in the upper part of the kiln, not with the firewood. Remember that they must keep their distance from each other.
Step 3: close the kiln door and light the wood or the kiln if it is an electric one.
Step 4: if you can control the kiln temperature, it should be between 900 and 1100 °C. Leave your pieces for 3 to 5 hours.
Step 5: let the kiln and the pieces cool down well as they may break if you take them out while still hot.
Step 6: take your pieces out and wash them with water and a sponge.
Step 7: after washing, place them in a cool, humidity-free place.
The result of this firing technique is pieces of natural, gray, red, or brown color with ash speckles, that is, ash remains in certain places of the piece.
Regular firing
The last type of firing we want to mention today is the regular or typical firing. In this technique, the potter can use any kind of fuel, only this time it goes apart from the pieces.
The step-by-step process of regular firing
Step 1: before you put your pieces in the kiln, make sure that it has all the firing furniture you will need. If you don’t know what we are referring to, we invite you to read our blog on 5 types of kiln furniture.
Step 2: once the kiln is ready, insert your pieces and remember they should not be stuck together or they may get damaged, especially if they are decorated already.
Step 3: place the kiln fuel that usually goes at the bottom of the kiln. Then turn it on.
Step 4: set the oven to the appropriate temperature and let your pieces bake for as long as it takes.
If you do not know these details, we recommend you always ask your clay dealer at which temperature and for how long you should put it in the kiln.
Step 5: once the pieces are ready, let them cool down inside the kiln.
Step 6: after they have dried, remove them from the kiln.
Step 7: if you feel that the pieces are a little dirty, wash them only with water and a soft sponge to remove any imperfections you may see.
Step 8: and finally, leave them in a cool place. Simple, isn’t it?
Recommendations to keep in mind
The firing process can be dangerous as you are dealing with fire and high temperatures that can cause accidents like burns.
We do care about you and do not want anything negative to happen to you; quite the contrary, we want your ceramic process to be the best. For this reason, here are some tips that you should keep in mind every time you fire your ceramic items.
- Before starting the firing, make sure all the materials you need to complete the process are ready, for example, the fuels you will use.
- Always be careful when handling your pieces, the fuels, and the kiln, not only to avoid damaging your creations but also hurting or burning yourself. You can use some tools to facilitate the firing process, such as the kiln furniture, and also, do not bake your pieces longer than necessary.
- Before starting the firing process, wear the necessary protection. We advise you to use protective goggles, refractory gloves, a mask (polyester, industrial, N95 type, or respiratory mask), and protective clothing, such as an apron or overalls; elements that you must have in your workshop.
And that’s all for today’s blog. We hope you liked it and you have learned all about the firing process. Keep practicing and trying all these firing techniques.