
Translated by Nick R
Did you know that making objects out of clay helps the earth and saves money? Yes, just like that! Clay is easily reusable, which helps your pocket and the environment. However, don’t worry if you don’t know how to recycle it because we will explain you.
It is a very simple task and has many benefits, so we highly recommend you to start doing it by following the steps that we will show you in this blog.
In addition, we will explain why it is good to recycle your clay, where and what kind of clay can be recycled, and some valuable tips for preserving it and making it last for long.
Table of Contents
Why recycle clay?
Recycling leftover clay is a helpful and crucial activity within a workshop, given all the benefits it can bring. Every professional potter and large workshop you know does so. We can tell you that.
But what are those benefits? You see, there are 3 main ultra-good aspects that you, your workshop, and the planet could get from it.
1. You will waste no material at all, as can happen in other artistic exercises. In the art of ceramics, the leftovers of ceramic modeling may be used time and again for new artworks.
Once again, if there is clay leftover from making the new piece, that clay will be used again for a new one. Here you can observe a 0% clay wastage, ceramic’s principal material.
2. By wasting nothing and passing that remaining material through a process to enable its use as raw material for something else, which in this case is the same material (in its initial state), you are putting into practice one of the 3 R’s: recycling.
In addition to helping the planet, you can also think of it as one of the 3 pillars of sustainable business development, which are environmental, social, and economic.
3. You will save a lot of money because you will not have to buy the essential raw material, again and again every month. You could buy a large clay block, take the necessary pieces for the works you will make from it, and recycle what is leftover afterward.
We promise that if you judiciously recycle the remaining clay, you will still have plenty of material from the recycled clay when running out of the initial block. According to the amount of leftover clay from each piece you made, you will be able to form almost 1/4 of the original block with mere recycled material.
Because we know money is a fundamental factor when doing an art project. We recommend saving in all areas where you see it can be done, like this one. This way, you will not spend much money buying clay until necessary.
When you can take clay for recycling
There are many occasions in which we can take leftover or dried clay to recycle to avoid letting this great material go to waste. These are:
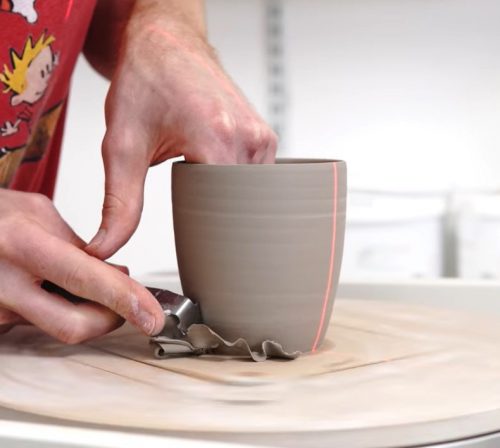
- You can recycle the clay that was removed from the piece when polishing it with a pitter or scraper during modeling. These scraps stay on the work table or inside the potter’s wheel on which you modeled the piece.
They are not large pieces; they are very little bits most of the time. Therefore, you can wait to have a large amount of clay left over to recycle it.
- If you damaged a piece when you were modeling it, don’t worry, that clay can also be recycled. You can either wait for it to dry to mingle it with the rest of the laying-around clay or wet it thoroughly to start with the recycling from a more advanced point (you will understand this later on).
- You do not need to have used the clay already to be able to recycle it. As long as the clay is stiff and totally dry, you can also carry out this process to save it and model pieces with it.
By saying this, we refer to that unfortunate moment when you realize that the block of clay you use was not sealed properly, and therefore, the air got into it and dried it out completely.
If this had happened to you and you had a big headache because you didn’t know you could recover this clay, don’t worry anymore because we will show you how you can return it to its natural state.
What you need to recycle your clay
To recycle the clay you won’t need many materials, besides, most of them you already have in your workshop, so don’t worry.
- Large container
- Pitcher with water
- Large plastic piece
- Mallet or hammer
- Electric mixer (optional)
- Large mesh strainer
- Plasterboard or plaster
- Plastic bag
Step by step
Now that all the materials are ready. Let’s get started!
Step 1: first of all, gather all the remaining clay pieces you have saved and place them on a table covered with a large sheet of plastic wrap to avoid damaging them.
It is recommended to do this when you have enough pieces of clay so you don’t have to do it many times and therefore waste water.
If you have work pieces that have dried that you no longer want to use either because you don’t like how they turned out or for some other reason, put them next to the pieces as well.
Step 2: take the mallet or hammer and begin to pound the dried clay pieces. Be careful because small bits may fly out and fall into your eyes. If possible, wear protective goggles.
In order to avoid damaging the table with a bump, we advise you to use plastic over the table. Besides, it will help you keep the table tidy as only the plastic will get dirty.
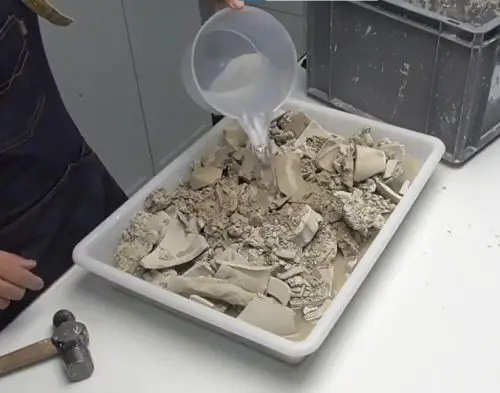
Step 3: now, pour the ground clay into the plastic container and fill it halfway with water. Try to add the clay carefully so pieces do not fall on the floor. Even if it is few, it is less material that you will have at your disposal later for modeling pieces.
Step 4: let the clay moisten for a few minutes inside the container.
Step 5: after a few minutes, knead the clay a little to remove possible lumps.
If you don’t want to dirt your hands, use an electric mixer. However, by using them, you will make sure there are no lumps.
Step 6: when the dry clay and water mixture becomes creamy in consistency, you can pass it through a large mesh strainer to verify that it is free of lumps.
Step 7: when straining it, you can let it fall on the plaster or plasterboard. Then, you may wonder why the plaster has to be made of plaster; plaster is a porous material that helps to absorb all the water from the dough.
In case you do not have clay chunks but only a very wet piece that got damaged during modeling or an almost liquid clay left on the potter’s wheel; it is from this step that you can start recycling your clay.
Remember that if you were just making the piece and the clay got damaged but was not too wet, you can knead it again and work with that same material right away. There would be no need for recycling here.
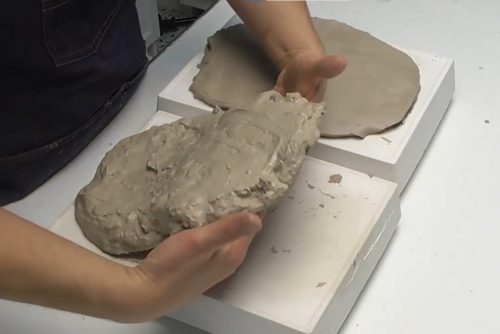
Step 8: now you have to spread the dough well over the plate so it can absorb the water much smoother.
Step 9: leave the dough on the plate for a few hours and then turn it over so that also the water on the other side is absorbed.
Step 10: once the plaster has absorbed the water on both sides of the dough, you can start kneading your recycled clay so as to remove any excess air it may have.
This is done because, remember that, if the clay has air bubbles in it, it is very likely that when it is in the oven, due to the heat, the piece will burst. So not only that one, but all the production you have in the firing process would be damaged.
Step 11: and that’s it! In your hands, you have your recycled clay to use for making any piece you could think of as if it were freshly bought clay from your local art store.
However, if you want to keep it well, so it lasts for a long time, you will have to use a plastic bag, which we will let you know how to do.
Taken from: Espacio Dual Cerámica
How to preserve your clay for a long time?
Knowing how to store clay properly to be conserved in its natural state for months is another great way to use clay again and again saving time and avoiding waste.
To achieve this, you have to follow simple little tips, yet if you miss any of them when storing the clay, everything can fail, so take note to do it correctly.
Whether it is brand new clay or recycled clay, you must follow the tips so that you, as months go by, can continue to make magnificent pieces with that clay.
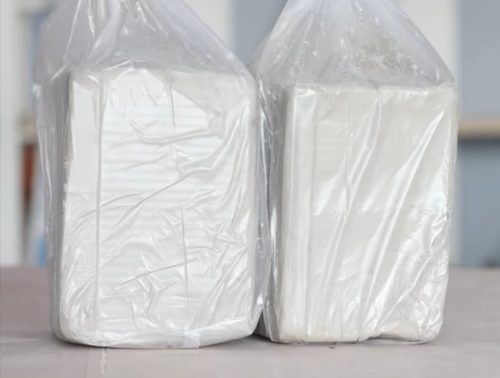
The first and most relevant thing for keeping your clay well is a plastic bag, which should be plastic since it keeps the clay’s heat and humidity very well, helping to prevent it from drying out.
So, right after kneading your recycled clay, you have to form a block with it. Then you have to lay the plastic bag all over the block to verify that it will be well sealed. Before sealing it tightly with a vacuum seal, leaving no free space, spray some water on it with an atomizer.
This water will be absorbed by the clay and thus keep it moist enough to enable it to last while you cut new pieces for your artworks.
Each time you uncover the block to cut a chunk, you must sprinkle some water on it.
It has to be done because the clay may have been covered for a long time and have no water, and without water, no matter whether you seal it well or poorly: it will harden.
The environment where you keep the clay block is also important; it cannot be too hot or cold. If too hot, the clay will likely reach a point close to melting, and if too cold, the clay will harden quickly.
Depending on the climate, you will know the perfect place where it would be cool enough to ensure its preservation.
Taken from: Jonthepotter
We have reached the end of this blog, and we hope we have been of great help to you to know what are the benefits of recycling clay, both for your pocket and for the environment. You could already see that recycling this fabulous material is not complicated at all. So don’t hesitate any longer; start doing it in your workshop. You won’t regret it.

