
Translated by Nick R
Certainly, if you are into ceramics or are just starting out, you have already heard about underglaze and on-glaze decorative techniques. But what is that? How is it done? or what materials do I need?
Well, don’t you worry anymore, because today we will explain everything you need to know about these decoration techniques and solve all doubts you may have in the process.
Table of Contents
Ceramic underglaze
The underglaze decoration technique consists of applying different colors over the bisque-fired piece, namely when the object has been fired but is still a little damp. After this, a layer of transparent glaze or varnish will be added to provide a shiny finish to the piece.
This technique is one of the easiest to do, and that is why there are various application methods nowadays. And, as we promised you, we won’t leave you with any doubts, so, below, we will be talking about every single way there is to apply this terrific decorating technique.
Underglaze with silicate oxides
This method is done using silicate oxides. Silicate oxides are colored powders that come from stone-like minerals found in nature.
You can usually get ready-to-use coloring oxides in stores specializing in handmade pottery materials. When using them, we advise you to test the colors; apply only a little to see the result because there are colors that may give a different result than expected.
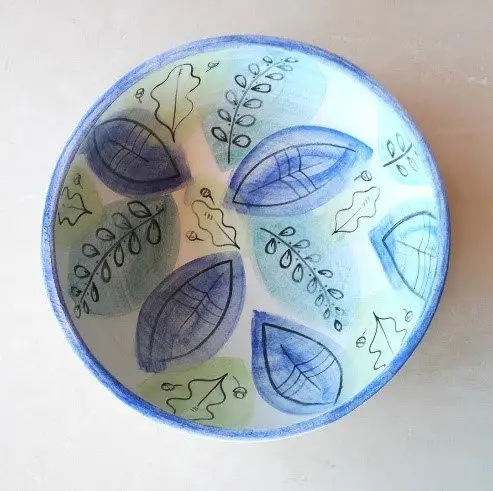
You can apply them with paintbrushes and combine them as you like.
Underglaze with ceramic pencils
The continuing method involves using coloring oxides and ceramic pencils. Now, you might be thinking that ceramic pencils are just like any other pencil, but you’re not wrong.
Ceramic pencils are very similar to crayons and are handled in the same way; therefore, it is helpful and ideal for drawing the figures you want on your pieces.
They come in different colors, and you can get them in physical or online stores selling this type of items.
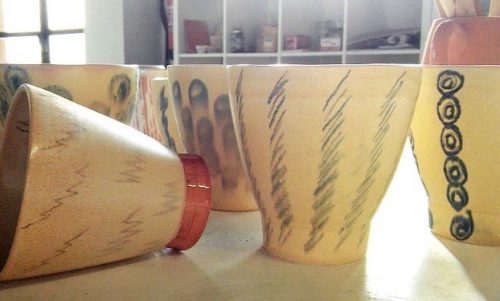
Usually, to apply them, you just have to draw directly on the ceramic, or you can watercolor and blur to have various effects. It is a matter of playing and experimenting with them. Before applying them, ensure that the surface is well polished so that it is not difficult applying them.
After applying the colors using the ceramic pencils, all you need to do is remove the excess powder and apply a coat of transparent glaze.
Underglaze with crayons and chalks
This technique is much like the previous one, but this one uses a different type of pencils that, when applied to the ceramic, gives a chalk or wax effect.
To implement this method, you just have to pass the chalks or crayons over the fired piece, that is, once it has gone through the kiln, and begin to draw the designs you want to make on your ceramic object.
Finally, apply varnish or transparent glaze, and that would be it. You will really like the results.
Underglaze with sponge
The procedure for applying the underglaze technique with a sponge is little known and used by some ceramists and potters to decorate their pieces. Ordinarily, the sponge is a most essential tool for cleaning or removing imperfections from the art pieces; however, it will play a different role this time.
Thanks to its high capacity of absorption, the sponge will absorb paint and silicate oxides and with it, you will be able to apply those substances to your ceramics. Believe it or not, you can also use the sponge to make shapes or fill them.
To finish, as with the other methods, you only need to apply a transparent glaze or varnish and give shine to your creation.
Underglaze with stencils
This method is somewhat similar to the previous one, only we will use paper or fabric stencils with motifs of your choice this time.
For this technique, you have to place your stencil over the object and then apply the glaze you have chosen for your creation. You can notice that the paint goes through the stencil and leaves the figure marked, so you must lift it slowly and let it dry.
Finally, the step that cannot be missed in this approach: apply the glaze or clear varnish to the piece. You should know that, even after letting it dry for a long time, your artwork may remain fresh; therefore, we recommend applying the glaze with a sponge in small touches or with a spray gun so the design will not get damaged.
How to do the underglaze technique?
Certainly, after seeing all the different ways available to apply the underglaze decorative technique, you would like to learn how to do it with your own hands.
Therefore, here you will find everything from the materials you need to the step-by-step instructions to learn this fantastic technique.
Materials
- Coloring oxides
- Paintbrushes
- Sponge
- Bisque piece
- Pencils, chalks, and ceramic crayons
- Glaze or transparent varnish
The step by step
Now that you got your materials ready, we will explain the step-by-step instructions to follow for this technique.
Step 1: wet your sponge and wring it out well.
Step 2: wipe the wet sponge all over your piece. This will help you remove all the imperfections left after the firing, and at the same time, you will get it completely smooth to continue with the following steps.
Step 3: choose the tool you will use to apply the underglaze technique: it can be wax, brushes, sponges, chalk, or ceramic pencils. If you are not sure what to use, you could use them all and mix them.
Step 4: if you have decided to use oxides, start applying them with the brushes or the sponge. Moreover, you can paint one or more tones on your piece and then draw some figures with your ceramic pencils or chalks.
Another option is to draw some figures on the ceramic piece and then cover it with coloring oxides using a brush or sponge.
Step 5: let everything you have designed before dry very well.
Step 6: when dry, apply a 3mm coat of transparent glaze or varnish to provide your piece with a shiny touch. As shown in the following image.
One tip we give you is to apply this layer with small touches and not drag the brush, or you could damage what you have done so far.
Step 7: let this layer dry well in the open air; you will see that the thick layer dried without traces. And that’s it, you now have a piece beautifully decorated with the underglaze technique.
On-glaze decoration in ceramics
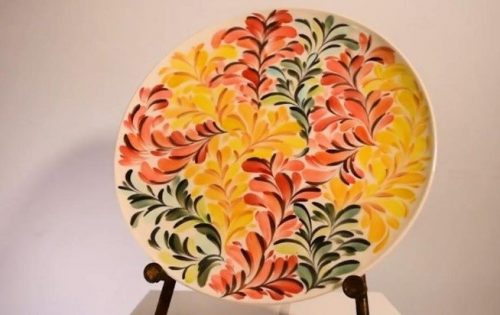
As its name suggests, the on-glaze decoration technique is done over a layer of glaze already applied to the piece. Generally, this layer has a light tone like white, which allows adding more colors on top.
This technique, as well as underglazing, is easy to apply and for that reason is used by many ceramists around the world. You should know that, for practicing it, it is not necessary to have your piece fired because you can apply it in 3 different ways, which we will discuss below.
On-glaze on raw
The first method you can try requires doing it on your raw piece, that is, before firing just when the art piece is almost dry but still a little bit wet.
What you should do is apply the clear glaze, let it dry completely, and then add more colors that you want to paint or, why not, draw certain figures.
Afterward, you should let it dry very well and fire the piece. Here be aware that the firing temperature should be low; a maximum of 750 °C, since this is the temperature that the glaze layers can withstand and the right temperature to achieve this amusing effect.
Finally, you just have to wait for the piece to cool down in the oven and take it out. In this way, you will have your artwork ready using this first method.
On-glaze on semi-fired
As the second method, you can use the on-glaze technique on semi-fired glaze, that is to say, the piece has been fired at temperatures between 400 °C and 600 °C (700 F to 900 °F).
What you need to do for this method is to take the piece out of the kiln once it is cold and then apply a coat of white glaze and three coats of varnish or transparent glaze, which you must let dry completely.
Afterward, you begin to apply the silicate oxides with your brush or sponge or draw whatever you want using ceramic chalks and pencils.
Finally, you take the piece to the kiln at another firing between 400 °C or 600 °C (700 °F or 900 °C). And that’s it.
On-glaze on Fired
This method is pretty much like the previous one. The only difference is that the piece is fully fired at more than 900 °C (1,600 °F). After that, it is taken out of the kiln, and the same glaze and varnish layers that you applied in the previous method are applied to it.
Next, the only thing you have to do is to repeat the same procedure that we have already explained in the overglaze method.
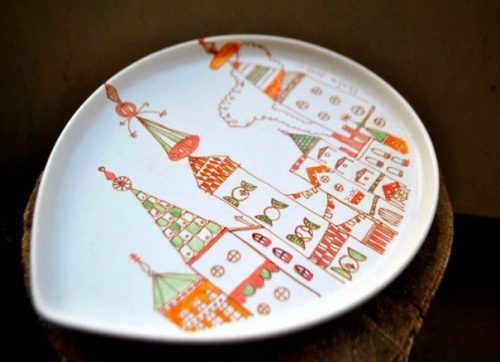
Another thing you should know about the overglaze decorative technique is that you can draw your figure on paper and then trace it on the ceramic.
How to do the on-glaze technique
If you liked the underglaze technique, we bet that the on-glaze technique also caught your attention. Now, we will tell you what materials you need to apply it and explain step by step how to do it.
Materials
Coloring oxides
- Brushes
- Sponge
- Bisque piece
- Pencils, chalks and ceramic crayons
- Transparent glaze or varnish
- White glaze
- Butter sheet or tracing paper
- Linseed oil
- Needle
- Piece of charcoal
- Linseed or lavender oil
The step by step
The moment you were waiting for has arrived. Now we will explain the step-by-step instructions that you must follow in detail to apply this wonderful technique to your ceramic pieces. But, before starting, we want you to know that the following steps are mainly for flat works.
Step 1: apply a coat of white glaze to your raw piece, that is, almost dry but still wet, and let it dry very well.
Step 2: put your piece in the oven at 700°C (1300°F) for 2 hours. Let it cool down in the oven before taking it out.
Step 3: on your sheet of butter paper, draw the design you want to make.
Step 4: once your piece has dried, place the paper on top exactly where the figure will be.
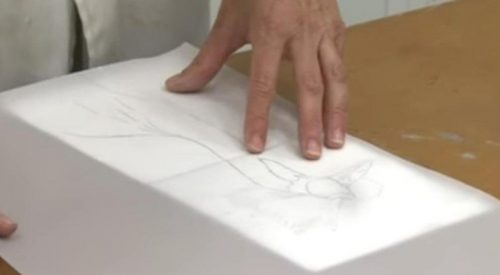
Step 5: hold the paper tightly and begin to pierce the borders of your drawing with the needle.
Step 6: then, run the charcoal piece over the entire figure from the right side of your sheet as if you were coloring. It doesn’t matter if you run over the edges.
Step 7: remove the paper and see how the figure’s edges are marked.
Step 8: mix the coloring oxides to be used with linseed oil or lavender oil. Keep in mind that the initial amount of these substances recommended is about the size of a blackberry. However, if you feel that you need more, you should always mix them little by little until you get the amount you need.
Know that the purpose of these oils is to enable the colors to stick to the glazed piece, as water will not give the same results. Curious, isn’t it?
Step 9: start painting your figure with a brush or sponge using the silicate oxides or dyes of the colors you chose. You can also paint the outside of the figure if you wish.
Step 10: bake the piece in the kiln again at a temperature of 750°C (1387 F) and take it out when ready.
And that’s it, you have finished your underglaze piece. Easy, isn’t it?
So here we come to the end of another blog. We hope you have enjoyed and learned about these decorating techniques that maybe you had already heard about but had not tried. Now that you have learned them, what are you waiting for to practice them on your pottery?

