Translated by Nick R
Who has never broken a piece of ceramic or porcelain? Naturally, most of us. But, what really hurts is if it was one of your beloved pieces or had a special meaning to you. How painful to know that all those pieces will go in the trash, right?
Well, no more worries! We have a solution for you to recover and mend your ceramic or porcelain broken pieces: Kintsugi. Here you will find everything you need to know about this art.
Table of Contents
What is Kintsugi art?
Kintsugi art is a technique of Japanese origin used for many years. It consists of using powdered metals, of which gold stands out, to cover the cracks of a ceramic piece, or to join large bits of broken items.
The main idea of Kintsugi is to highlight the cracks of the pieces in a distinctive and eye-catching way while allowing you to preserve and remodel your damaged objects. These objects are proof that time leaves scars and serve as a metaphor for how fragile life is and how it can change from one moment to another.
Brief history of Kintsugi art
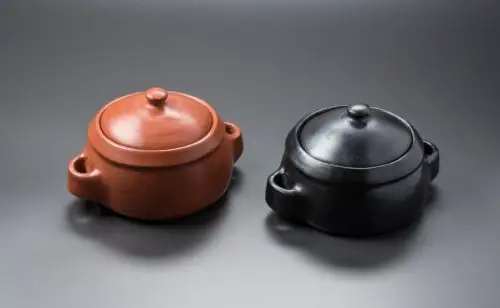
The word Kintsugi translates as “gold carpentry”. Art Kintsugi originated in Japan in the 15th century when the Japanese shogun Ashikaga Yoshimasa sent two of his favorite ceramic teapots to China to be repaired after they got broken.
Upon receiving them, he realized that they were fixed with metal staples that looked very ugly on the compositions and completely spoiled the aesthetics of his pieces.
Seeing this, Ashikaga Yoshimasa sought help from Japanese craftsmen so that they could be the ones to fix this problem. Japanese potters began to look for other ways to make the repair required by the Japanese shogun. It was then that they discovered that using powdered metals, like gold, on the cracks was a better and prettier technique to fix the broken ceramic items.
By the 17th century, the art of Kintsugi became so popular that it got influenced by philosophical ideas. One of the principal was the Japanese philosophy of wabi-sabi, which stated that the piece cracks conveyed the beauty of imperfection.
In addition, by this time, the technique became so known that rumors claim that a Japanese warrior, whose name is unknown, broke and repaired tea bowls to sell them and profit from them. This meant a new breakthrough in ceramic decoration.
Methods for making Kintsugi
Currently, there are 3 different ways to do Kintsugi art: the crack method, the piece method, and finally, the method of joint convening.
Below, we explain them and show you pictures of the results. But, before starting, keep in mind that all the techniques use resin and powdered precious metal like gold, silver, and platinum, among others, but the results are different.
Also, remember that resin is a sticky substance used in pottery to glue ceramics or decorations to clay.
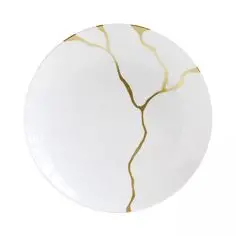
Crack method
This method requires less resin to glue the parts of the pieces. The lines made in this method are usually thin, as they simulate shiny veins.
The amount of precious metals used for this method is also minimal, yet it achieves its goal of standing out on the pieces.
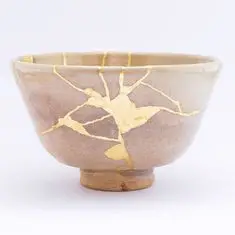
Piece method
The piecing method is employed to replace those bits of your piece that are lost or are so small that they are impossible to join together.
The idea is to completely fill the space of the missing piece with resin and then with the precious metal to be used.
The result looks totally cool, and we know you’ll love it.
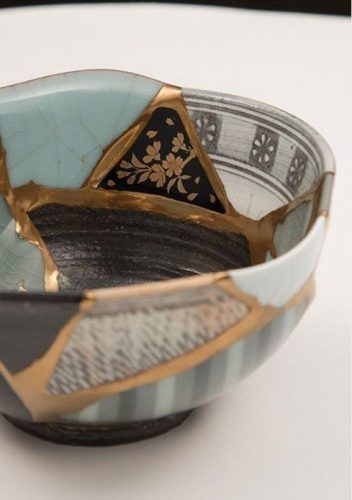
Joint convening method
The joint convening method is one of the least known and least used as it looks rare at first glance; however, it can also be considered real art.
This approach to applying the Kintsugi technique consists of replacing pieces of the object with others of similar size and, above all, that come from another object, in other words, you must combine two entirely different works in order to make it.
In the end, you just add resin with the precious metal to the edges. We know it may sound weird, but believe us, once the process is finished, the results are just magnificent.
How to apply the kintsugi technique in ceramics?
The moment you’ve been waiting for has arrived! Here we will teach you how to apply the art technique to your ceramic pieces. But first, know that the elaboration process of this technique has 5 phases.
The first phase is known as the accident, and during this phase is when the object breaks, and thus you must gather as many pieces as you can. The second phase is called assembling; you have to clean your pieces and start to assemble your object.
The third phase is called repairing, and if it is not obvious already, in this phase, you must apply the resin and the precious metal while gluing all the pieces. The fourth phase is the waiting phase, and during this phase, all you have to do is wait for the resin and metal to dry.
Finally, the fifth and last phase is to reveal your work of art. Very easy!
The materials you need
- Broken ceramic piece or pieces
- Paintbrushes
- Gold powder
- Nitrile gloves (optional)
- Wooden sticks
- Liquid transparent glue or resin
- Masking tape
- Dry cloth
- Sponge
- Water
- Epoxy putty (for part method)
Every material you need for making Kintsugi is easy to get, you can usually buy them in miscellaneous and stationery stores or on internet stores like Amazon or Mercado Libre, so you don’t have to worry about this.
Step by step
Now we will explain the step by step you must follow in detail so you can apply the Kintsugi technique to your ceramic pieces. Let’s start!
Step 1: gather as many pieces of the broken ceramic as possible.
Step 2: begin to assemble the ceramic object until you have it almost complete. By the way, you should memorize the position of each piece.
Step 3: put on gloves if you don’t want to get your hands messy with glue. This is optional.
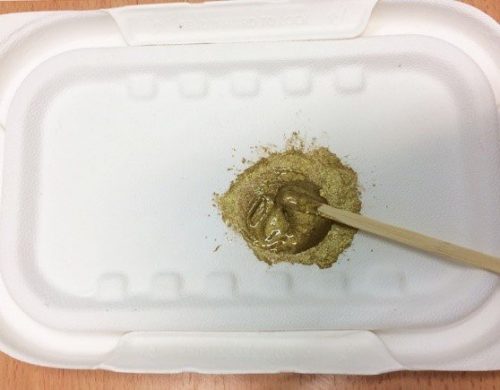
Step 4: once the piece is ready, you must mix the glue or resin with the gold powder. You can make this mixture in a disposable plastic or Styrofoam (expanded polystyrene) container that will no longer be used.
The quantities of glue and powder you add should be proportional. We recommend adding a teaspoon of each substance.
Note: keep in mind that the glue or resin dries very quickly, so we suggest preparing only a small amount of mixture and mixing more as it runs out, and so on while you work.
Step 5: apply some of the mixture to the edges of one of the pieces with a wooden stick and start to join the other pieces together. Make sure to put a generous amount on the edges so it is noticeable when they are attached.

Remember that each piece you are joining must be smeared with the mixture on the edge.
Step 6: every time you glue a piece, keep it still and add pressure so it does not separate.
Step 7: if possible, stick masking tape to hold the pieces together as they dry. Stretch the tape tightly so that it can hold the glued pieces to each other.
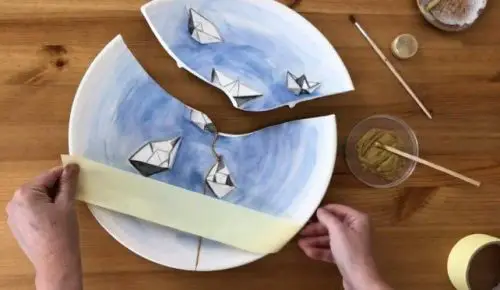
Step 8: after about 10 minutes, carefully remove the masking tape.
Step 9: prepare some more glue and gold powder mixture.
Step 10: with a wooden stick, apply the mixture to the cracks lacking more of the solution.
Step 11: dip the brush in gold powder and sprinkle it on top of the cracks that might still have fresh glue.
Do this both over and under the piece, or, failing that, outside and inside the object.
Step 12: let the piece dry thoroughly for at least 4 hours.
Step 13: after these 4 hours, use your dry cloth or other dry brush to wipe the piece and remove the excess gold powder.
Step 14: dip the sponge in water and wring it out very well. It should remain wet.
Step 15: wipe the sponge inside each piece without touching the gold powder edges. This will help you remove imperfections such as bits of mixture that might have slipped out of the cracks.
Likewise, if you want to do the joint conveying method, just follow these same steps. Conversely, for the piecing method, you would need to follow the following steps:
Step 1: do the first 3 steps explained above. Gather the item fragments, put them in order, and put on a pair of protective gloves.
Step 2: take a piece of epoxy putty and start kneading it until it feels like plasticine. It may take a while as the putty is tough.
Step 3: arrange the piece or pieces you want to add to the object. Make sure they are the same thickness as the other pieces.
Step 4: let these pieces dry and harden in the open air.
Step 5: prepare a proportionate mix of glue or resin and gold powder.
Step 6: glue the pieces together by applying a mixture layer along the edges.
Step 7: apply a thick mixture layer on top of the putty pieces.
Step 8: continue from step 6 to step 14 given above as the first instructions.
Note: this time, also, sprinkle the gold powder over the mixture layer on top of the putty bits to cover them completely.
Step 9: wipe the wet sponge only on the ceramic, not on the putty, or you could remove these gold pieces and ruin your creation.
And that’s it! Your Kintsugi pieces are finally ready.
Master Takehito Kobayashi
Takehito Kobayashi, born in 1981, had a father who loved pottery and who inspired Takehito Kobayashi to invest a great part of his childhood learning about the processes of making pottery in Japan.
After finishing his studies, he began to work as a beautician for 4 years. At the age of 25, he started a business renting vases and flower vases for restaurants. That was when he received his first request for a Kintsugi, and from then on, his passion for this art grew so strong that he decided to do studies and practice in Kintsugi.
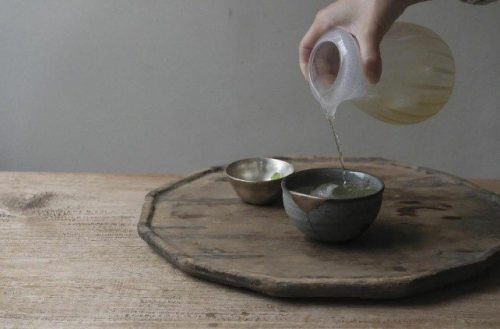
In 2009, at the age of 27, master Kobayashi created Wad: an enterprise comprising of spreading and highlighting the beauty of Japan through ceramics. Wad is a space where people can enjoy tea while getting to know ceramic works of different authors.
By 2012, the master performed his first lecture on the Kintsugi technique in Poland. Thanks to its success, 5 years later, he launched his workshops on this technique in Taiwan and Korea.
In 2019, Takehito Kobayashi presented the art of Kintsugi at the World Heritage Research Center and the Cernuschi Art Museum in Paris, France. He continues to give lectures and workshops on this technique, both outside and inside Japan.

And that’s how we end today’s blog, so tell us, what do you think? Do you like the Kintsugi technique? We cannot wait to repair our ceramic pieces using this gorgeous art. We invite you to try it too, and we promise you’ll love each and every result. Continue learning with the many tutorials we have in our blogs.