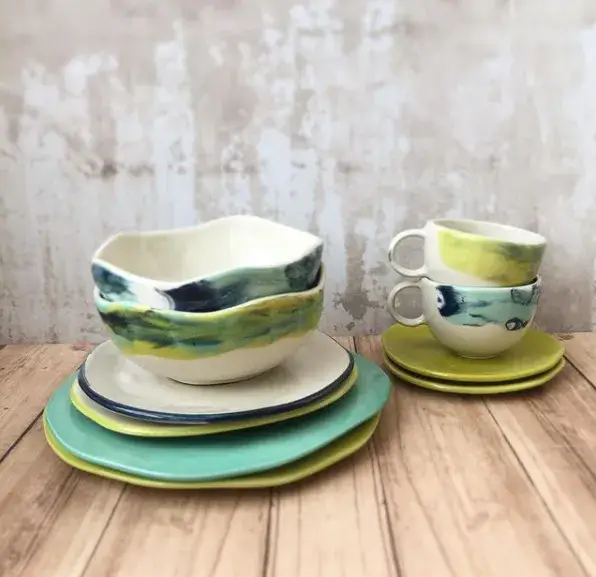
Have you ever wanted to take photos of your pieces to show your family and friends or upload them to your social media to sell them?
Not everyone is a professional photographer. That’s why we show you how to capture the magic of your ceramics in a simple and inexpensive way.
Table of Contents
Photograph ceramics with a semi-professional or professional camera?
Basically, the quality differences between semi-professional and professional cameras are small. The real differences in quality are made by the lenses. However, there are big differences especially in extreme situations.
This means that we, as amateurs, can also achieve very good results with inexpensive cameras and lenses. However, there are some factors to consider.
We will come to taking pictures with mobile phones below.
What do you need to take good photos?
- Semi-professional or professional camera
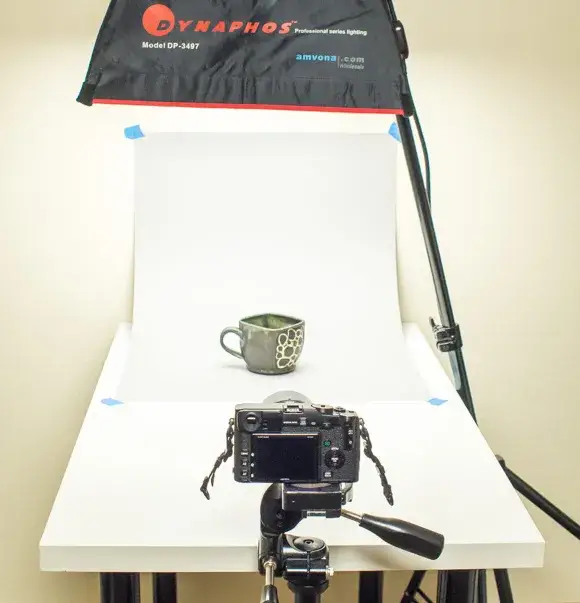
- A long piece of paper for an infinite background
- Tripod (preferably)
- Table or surface
- Duct tape
- A piece of cardboard
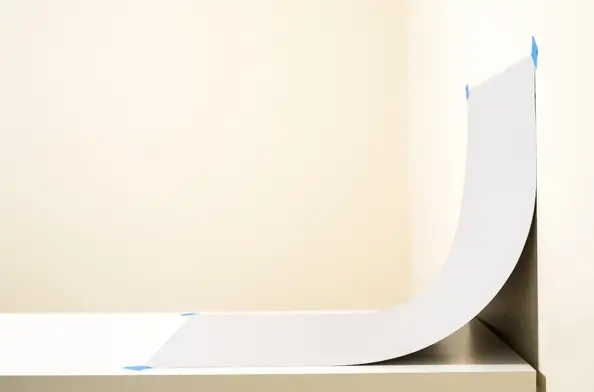
How do you construct a background?
In order to set up the background, you first have to think about the angle at which you want to photograph your pieces. If you want to photograph them from above, the ground will become the background. If you want to take a picture from an angle, then the floor and part of the back wall are the background. However, if you photograph from the front, the back wall becomes the background.
You can therefore take plain paper to underlay the desired object. For the back wall, we can use any wall and just stick a piece of paper of the desired color on the wall.
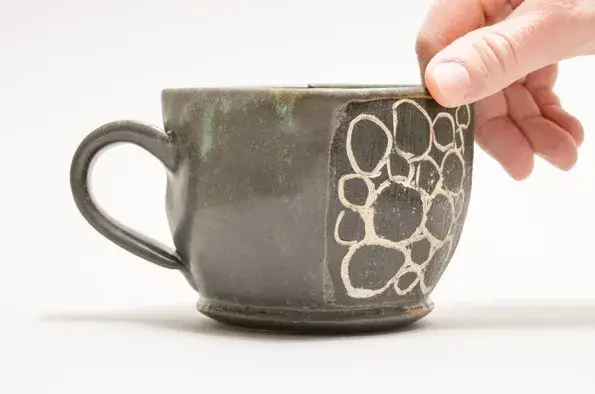
Position pottery for the photograph
You should position the piece to be photographed in the middle of the backing and centrally against the background. The goal is that you don’t see any edges or creases. The background should not show any abnormalities, as we want all the attention on the object to be photographed.
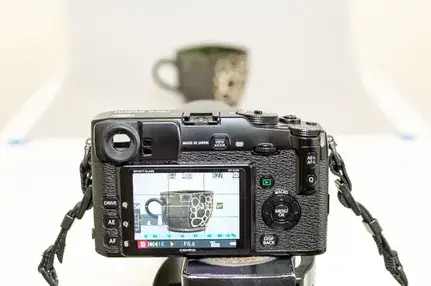
Use of tripod
The use of a tripod is not absolutely necessary. It helps with steady photography though. Especially when the lighting conditions and/or the camera and lens are not of high quality, the tripod helps to improve the picture. You can change the shutter speed without blurring the picture. This means the exposure is longer and more light hits the sensor.
The tripod also helps you to visualize everything spatially and to position the object better.
Use of light
For professional lighting, you can use a light ring or a soft box, or other light sources. Almost anything is suitable, from cell phone lamps to headlights for the construction site. You can also try different lamps and angles here and then compare the results. However, pay attention to the shadow cast.
Test the light source at different distances from the object, at different angles and in combination with other light sources. I am sure you will enjoy experimenting.
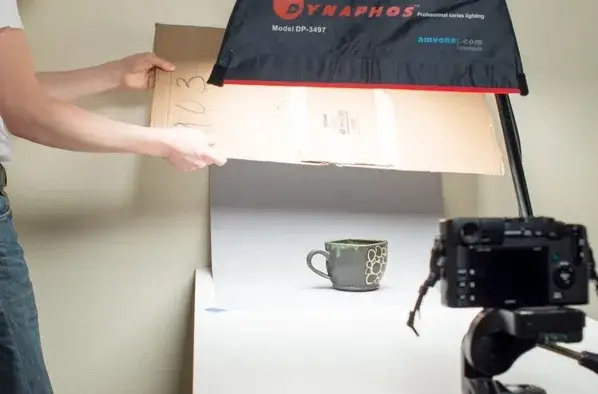
Creating a gradient in the background
Once you have positioned the light and the object, you can use a piece of cardboard to manipulate the gradient of the background. As soon as you hold the box up to the light, you will see a change. Again, try it out and compare the results.
Camera settings
When taking photos, there is a wide variety of camera settings that change the result. Factors such as B. Sharpness, white balance, ISO, and exposure time are important.
Inexperienced photographers use the camera’s automatic mode. It should be said to you here, however, that you can sometimes achieve considerably better results with manual settings. Again, try it out and compare the results.
To take a picture
Taking a photo is easy. Simply press the corresponding button and the picture is in the box. However, if you work with long exposure times, use the self-timer. This prevents any unwanted movements.
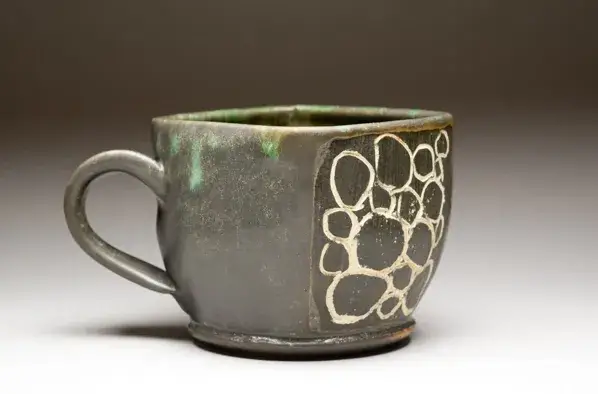
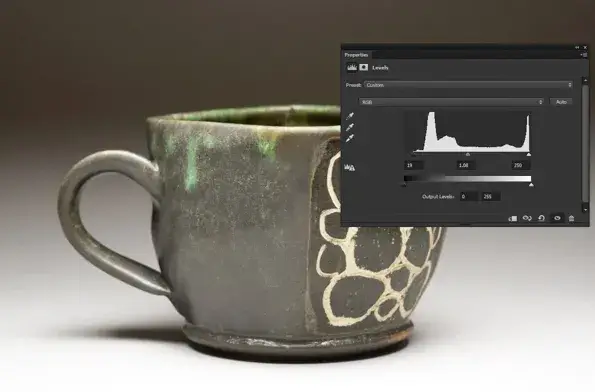
Photo post-processing
Professionals always speak of Photoshop when it comes to editing photos . Nowadays, however, there are many free programs that already allow many editing steps. Even on mobile phones today it is possible to carry out considerable and sometimes almost professional editing of photos.
You can do a little research on this topic and then just try it out.
Photograph ceramics with a smartphone
The quality of the cameras on today ‘s smartphones is very impressive. These small devices often work with software that makes the images look fantastic. It is now sometimes impossible to distinguish images from a professional camera or a good smartphone.
Again, external factors play a major role. If the lighting conditions are good, you can produce spectacular pictures with a good smartphone. However, if the lighting conditions are not optimal, the cameras of mobile phones with small lenses quickly reach their limits.
What do you need to take photos with a mobile phone?
- A mobile phone
- A pad
- Lighting
- Tripod (optional)
Select and position the underlay
As previously described, the underlay can be selected relatively freely. The colors can be adjusted with regular paper.
Lighting with mobile phone
Lighting is even more important for mobile phones than for cameras. Due to the small lenses of mobile phones, the sensors can only capture a limited amount of light. If there is too little light, you get noise in the picture. Noise in a photo is when it looks grainy.
Position the tripod with your mobile phone
A tripod can also help when taking photos with a mobile phone. This avoids shaking effects and can also increase the exposure time.
Position the light and adjust the lighting
Try different positions of the light source and change the distances to the object. Then compare the results to get the best possible exposition.
Take the photo
With the mobile phone, you also have the option of using the fully automatic function or adjusting the settings manually. I also recommend the self-timer here to prevent any wobbling effects.
Edit the photo
Many mobile phones come with pre-installed software to edit photos. If your mobile phone does not have the appropriate software, there are countless paid and free applications for editing photos.