Translated by Nick R
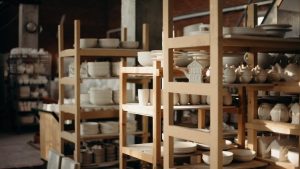
If you are a beginner in the handmade ceramics world, you probably do not have all the tools for practicing such fantastic art, such as a kiln or a pottery wheel.
That is totally understandable, yet you may be thinking that you will not be able to make your ceramics without these tools or that it will be too expensive to make them.
Well, we have a solution for you, so let all your worries go away; today, we will share with you a type of clay that you can use even without a kiln or a potter’s wheel. Great!
Table of Contents
What is air hardening clay
This is a type of clay exclusively created so that after modeling it, the piece can dry entirely in the open air. Note that this type of clay is different from cold porcelain and polymer clay.
This means you do not need a kiln or a potter’s wheel to use it; you can knead it and shape figures with your own hands. Besides, to dry it, you don’t need to expose it to high temperatures in a kiln: all you have to do is let it outdoors where it is not exposed to the sun or rain, and that’s it. Sounds great, doesn’t it?
Types of air hardening clay
Nowadays, there are 2 types of air hardening clay, which differ mainly in their uses, and below, we will briefly explain what they are.
Air hardening clay made out of paper is ideal for large pieces; thanks to its composition, this clay will be light but dense at the same time when dried.
On the other hand, air-hardening clay made of resin is perfect for elaborating small projects. It is characterized because, when it dries, it gets very hard and solid, so you can use it to make objects that will be constantly manipulated, for example, costume jewelry.
Uses of air hardening clay
Before we start explaining the uses of this clay, be aware that they are not the same as those of a clay kind that would usually be exposed to kiln firing.
However, this does not make it of less or poor quality: it is very reliable and helpful actually. Here are the uses of air hardening clay,
- It is perfect for making ceramic animated character figures in all possible sizes.
- It serves to make accessories such as costume jewelry or handicrafts.
- It is helpful for making decorative or utility items such as pencils and jewelry boxes.
Warnings and tips on the use of air-drying clay
Like any other dough, this clay also has some warnings and tips that you should know before you start using it. And, here we will tell you about them.
- The air hardening clay is very sticky and soft, which allows it to stick to surfaces of almost any material. So we suggest that, when working with it, you stay away from carpets and furniture and wear clothes that you can dirty and damage because this clay also sticks to fabrics.
- We do not recommend using the air hardening clay to make molds because it can shrink a little as it dries, which is a big problem for this object because your pieces will not be the same size.
- Do not use air hardening clay to make household objects, as this clay does not resist high temperatures or liquids. In addition, it can be toxic, so we advise you to keep it out of the reach of children.
- Once your objects are dry and ready, you must be careful, like with any other ceramic, because, although clay hardens when it dries, it can break or crack easily.
How to use air hardening clay?
Now that you know the uses, tips, and warnings of air-hardening clay, it is time to learn how to use it step by step.
Step 1: the first thing to do is choose which type of air hardening clay you will use. Nowadays, there are several types of clay distinguished by the tasks they can be used for.
If you are to manufacture a large object, we recommend choosing a clay type made of paper. While if you are going to make a small piece, you can choose clay made with resin.
Step 2: buy your clay on the internet or at craft pottery stores.
Step 3: lay the clay on your work table, and split a chunk you think is enough to make your piece.
The bit you will not use, wrap it in wax paper, then in a bag and then leave it in a cool place away from the sun and humidity.
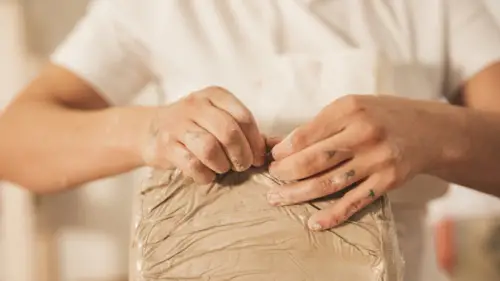
Step 4: start kneading the clay. Do this until it feels totally soft and easy to shape.
If you see the clay does not soften effortlessly, you can add some water to ease the process. Also, if you want clay of different colors, you can use ceramic glazes instead of water.
Step 5: start forming the desired figure with the clay; this is done without the potter’s wheel, only with your hands as if you were handling plasticine.
Step 6: if you want to add any decorative object to your piece, do it now while it is fresh. If you need them to better adhere to the dough, use liquid barbotine to glue them. In case you don’t know or don’t remember what liquid barbotine is, just remember that it is a transparent substance used to glue or add pieces or decorations to the clay. It is also used to join previously made ceramic pieces.
Step 7: once you have modeled your piece, take it to a cold spot to dry away from the sun and rain. Let it stay there for 24 hours.
Step 8: after these 24 hours, carefully touch your object and verify that it is dry; if not, let it dry for a few more hours.
Step 9: you can paint it with glazes or ceramic engobes once it has dried completely.
Step 10: let it dry for another 24 hours.
Step 11: after this time, the paint will be dry already, and thus, your piece will be ready.
How to make air hardening clay
Maybe you don’t want to buy clay, or you can’t get it easily; however, do not let this be a reason stop you from making pottery.
As we said, this kind of clay can be made by yourself at home, and it is quite easy to do. Thus you have no excuses for refusing to make your own handicrafts.
What materials do you need?
- 2 cups of baking soda
- 1 cup cornstarch
- 1 ¼ cups of water
- Food coloring
- 2 large plastic containers
- Metal whisk
- Pot to get dirty
- Regular sized metal spoon
- Paper towels
- Transparent plastic
Step by Step
We invite you to get everything ready and follow the next step-by-step instructions so that you can make your own air hardening clay.
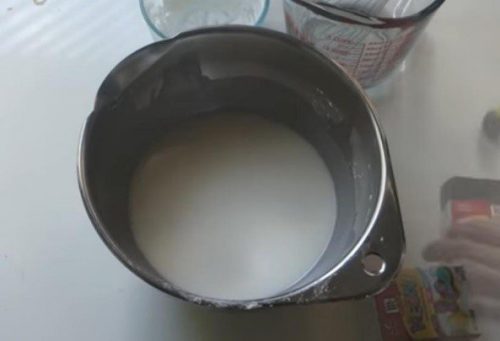
Step 1: add the 2 cups of baking soda and the 1 cup of cornstarch to a plastic container and mix well with the whisk.
Step 2: little by little, add water to the dough while you stir it very well.
Step 3: stir until the mixture is liquid and lump-free.
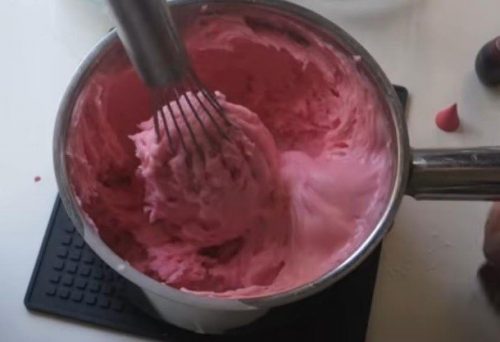
Step 4: pour in as many drops of food coloring as you want to add color.
Step 5: stir thoroughly to distribute the color evenly into the dough.
Step 6: transfer the mixture from the bowl to a pan that can get dirty.
Step 7: take the pan to the stove over medium heat. Keep it there for 5 minutes until the mixture has dried out and seems like it is trying to fluff up.
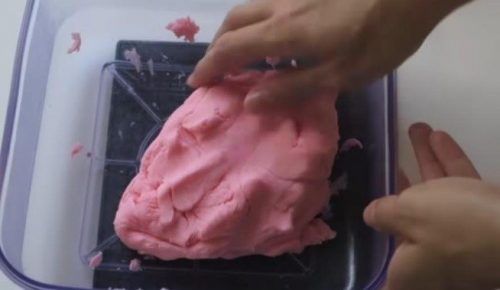
Step 8: transfer the dough to another plastic container, using a spoon to scrape the pan.
Step 9: once you have finished moving the mixture, flatten it with the spoon. At this point, you will notice that the dough texture will be similar to plasticine.
Step 10: lay some wet wipes on top of the container that will help the dough to cool down. You must wait until the dough is cold, so after about 10 minutes, touch it and check if it is already cold; if not, leave it for more minutes.
Step 11: once the dough feels cold, you can remove the wet wipes and start working with your clay.
Step 12: if you don’t use it all, we suggest you wrap the leftover piece in plastic wrap and store it in a cool place and away from high temperatures or water.
Where to buy air hardening clay
One advantage of this clay is how easy it can be found. Just like any other type of clay, you can buy it in physical or online stores dedicated to the commercialization of products for ceramic manufacturing.
Besides these sites, the air hardening clay can be purchased on e-commerce sites such as Amazon, Mercado Libre, etc.
We hope you liked it, and we encourage you to either get or make your own clay; it is perfect if you are beginning in the exciting field of art and craftsmanship.
If you are interested in making another type of pottery clay, we invite you to read our blog on how to make polymer clay at home. See you in an upcoming blog.