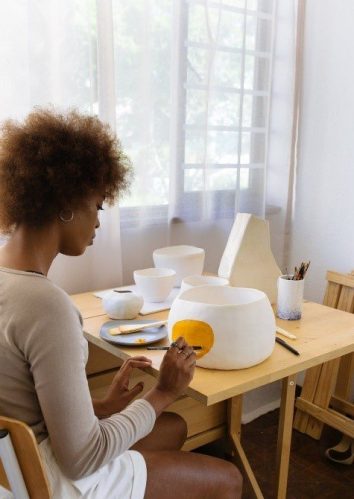
There are endless ways to decorate ceramics! We use different techniques and materials to give our pieces the personal style we want.
Table of Contents
What are ceramic engobes?
Let’s start with the basics, defining ceramic glazes. A ceramic slip, also called “engobe”, is a material made from a mixture of clay and water and is used primarily for decorating ceramic pieces.
Engobes were created between 753 B.C. and 476 AD in the Roman Empire. The Romans made their own engobes from natural raw materials such as earth and crushed stones, which were then mixed with water.
Ceramic engobes are known not only as a material but also as a decorative technique that has been used for a long time, as can be seen.
Characteristics and uses of ceramic engobes
Although engobes are mainly used for decoration, they also have other uses based on their properties:
- Improving the quality of the clay or the workpiece.
- To add volume or different textures to the figure.
- To make the dough waterproof, that is, the clay does not let any liquid through.
- To resist the piece.
- Adding and changing the color of the piece.
Difference between engobes and ceramic glazes
You might confuse engobes with traditional ceramic glazes. Here you will find the necessary explanations.
On the one hand, there are engobes that were specially developed for painting ceramics. They’re like paints, only they’re meant for ceramics. You can purchase different glazes and learn how to glaze your pieces.
On the other hand, engobes are not paints or glazes, but you can use them to change the colors that have already been applied or those that are still to be applied. You can also add new textures to your pieces with engobes.
Of course, you can use both glazes and engobes at the same time. In fact, this is a great way to decorate ceramics and the results are beautiful.
Types of Ceramic Engobes
Now that you know the concept, properties, and uses of engobes and how they differ from glazes, it is time for you to learn about the different types of engobes that exist in the world of ceramics.
In general, there are three types of engobes:
Classic engobe
The classic engobe consists of barbotine, clay, and water; in some cases, 1% to 10% color oxides are added.
As already mentioned, barbotine is the substance used in pottery to add mass or to adhere to the already modeled clay, or in other words your figure.
Remember that the intensity of the color depends on the amount of color oxide you add to the mix, the more the stronger the color.
Glazed engobes
Glazed engobes, also known as enamel glazes, owe their name to the fact that about 30 to 50% of their composition consists of glazes. A little water, slip, and clay is added to this engobe.
Engobe with clay glaze
The clay-glazed engobe consists of 50% or even a little more glazes, water, slip, and clay.
The difference between the latter two types of engobe is minimal, the vitrified engobes giving the piece a glassy appearance. The engobes with clay glaze also look like this, with the difference that the effect is much more striking and the color stands out more thanks to the amount of glaze that their composition contains.
Again, any previous engobes can be applied when the piece or dough is in a leathery condition, i.e. almost dry but slightly damp, or completely dry and fresh from the firing process.
Techniques for applying engobes
Engobe is considered both a technique and a material at the same time. Various techniques exist to apply them to the pieces or masses selected for this process.
Below we explain the 7 techniques with which you can apply engobes:
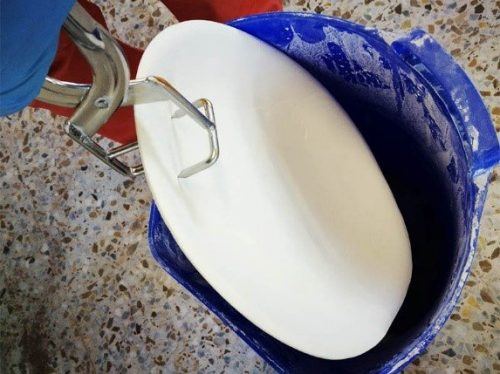
Dipping
The dipping technique consists in inmersing the entire piece into the engobe. For this, you need a large amount of engobe, which you fill in a plastic container.
Step by step
If you are interested in practicing this technique, here is a step-by-step guide.
- Make or buy the engobe you want to use. After that, pour them into a plastic container.
- Once you have poured the engobe into the plastic container, press or dip the object onto the bottom of the engobe. To make it look really good, you can use a very thin but durable stick.
- If the previous step is too difficult for you, we recommend tilting the vessel with the engobe to one side so that the piece can be well submerged.
- Let the engobe dry very well and try not to work on it too much until then, otherwise, it may be damaged.
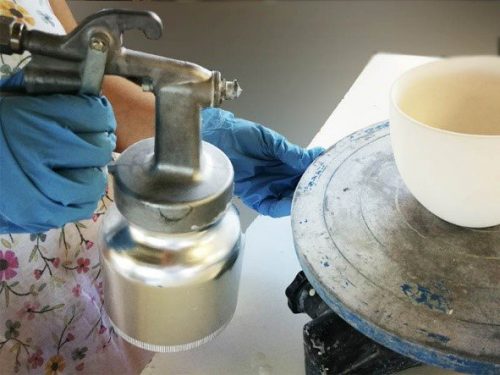
Powdering
With the powdering technique, the engobe is applied to the workpiece in powder form. It is usually used to give clay objects a different texture.
For this technique, you need clay powder with colored oxide and an airbrush or a sprayer that sprays the powder onto the workpiece with the help of air.
Also, we advise you to wear safety goggles, a mask, and gloves during the process as these materials can be toxic and we don’t want to risk any harm or accident.
Step by step
- First, you should grind up the clay powder with the coloring oxide as much as possible. In this step, you can use a pestle and mortar, which is a mug-shaped object with a short handle for crushing and crushing.
- The previously crushed powder is then strained using a sieve. Collect the powder that falls out of the sieve in a plastic container.
- This powder is put into the airbrush or sprayer, which you will later use to decorate the workpiece.
If you don’t have an airbrush, that’s no problem because this operation can also be done with a plastic bag. Step 5 explains how to do this. - Once you have finished pouring the powder, you need to apply the slip to your piece or clay slab. This slip should be liquid and can be applied with a brush.
- With the airbrush, the powder is now applied to the workpiece. If you don’t have this tool, you need to put the powder in a plastic bag, close it tightly and make a small hole in the bag so that the powder trickles out little by little. This way you can apply it to the piece as well.
- Another option is that you can use a lathe to turn the piece.
- When you have finished this work you will find that your piece is the same color as your clay powder but has a different texture that you can see with the naked eye.
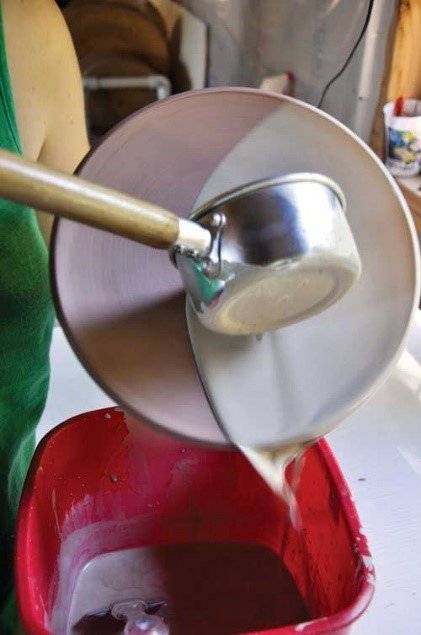
Casting
The casting technique is one of the simplest techniques there is. The engobe is poured over the entire piece.
To do this you will need pliers or a tool to hold the piece and a very large plastic container so you don’t waste the dripping engobe.
Step by step.
- Prepare your engobe however you like, but make sure it’s runny.
- Use the pliers to hold your work piece over the plastic container and on the other hand hold the container with the engobe.
- Now you can pour the engobe over your piece. Keep turning the piece until it is completely covered with an engobe at the end.
- When you’re done with that, wait a while for the engobe to stop dripping.
- Finally, let it dry very well.
Blasting
In sandblasting, the piece is rotated immediately after it is immersed in the engobe to give it a sandblasted effect.
All you need for this technique is your engobe, a brush, and a wooden or metal base that you don’t mind getting dirty.
Step by step
- This technique is so easy that you only need to place a portion of your workpiece in the engobe. Once it’s filled, take it out and turn it upside down so the engobe starts dripping and creates the sandblasting effect.
The other option is to brush a lot of engobe onto the piece, just enough to allow it to drip off. If you want your piece to be even, you can use the same brush to make the engobe drip off where you send it. - Finally, simply let your workpiece dry.

Masking
The technique of masking is used very rarely, one rarely sees such pieces. It consists in leaving spaces in the natural color of the clay without engobe.
All you need for this technique is your engobe and a brush.
Step by step
- Make sure your piece is in leather hardness, meaning it’s still slightly damp but just before it’s completely dry.
- Paint the engobe with the brush, leaving white areas free. If you don’t want to use the brush, you can pour the engobe randomly onto the piece, leaving voids.
Here is an example of this technique. In the picture, you can see that the upper part has been decorated with engobe while the lower part has been left completely empty with the natural color of the clay. - Once you feel like it’s finished designing, just let it dry.

Painting
The painting technique on engobes is ideal for anyone who likes to paint by hand and express themselves in this way.
For this technique, you only need your liquid engobe and the brushes you will be using.
Step by step
- The first thing you have to do is model your work completely and at least mold it into leather hardness to apply the engobe.
- Begin applying the engobe to your object as if you were painting. Do this as you like with the help of the brushes. Feel free to decorate your piece as creatively as possible.
- Let your workpiece dry completely.
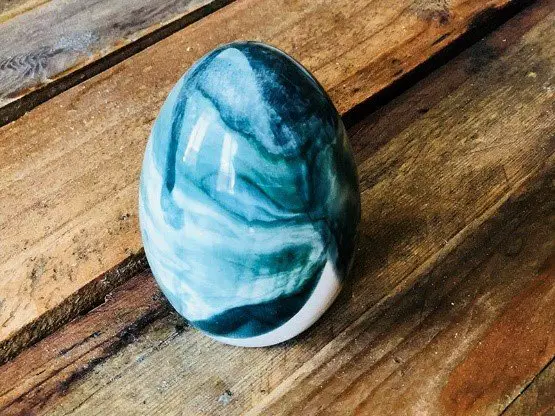
Marbling
Marbling is a very beautiful decoration technique, but it takes practice to apply it.
It allows more than two engobes to be used at the same time and is primarily used to give the pieces a marble effect.
For this technique, you need brushes, sponges, and your engobes. To achieve the marbled effect you should generally use at least 2 engobes, one colored and one white. However, you can add as many as you like.
Step by step
- Make sure the piece is in leather hardness.
- Using the engobes, draw lines of different colors next to each other on the same side of the workpiece.
- With the wet sponge, start blending the paint. It is very important that you do this step with small and quick touches until you can see the blending and the marble effect.
- Repeat step 3 until you have completed the figure.
- If you want your piece to shine you can apply liquid polyester for ceramics. However, this step is optional.
- Let it dry completely.
What we think is great about this technique is that there is another way to use it. If you want to know more, we invite you to read the blog about decoration techniques. Immerse yourself in the world of ceramics while learning other ways to decorate your pieces.
How do you make engobes?
The great thing about this technique is that you can make your own engobes and as promised we’ll now show you how.
Materials
First of all, here are the materials you will need to make your own engobes:
- White clay
- Dyeing oxides (these oxides are available in powder form in your choice of colors)
- Water
- Flux (paste that allows the materials to mix and liquefy)
- Food scale
- Plastic container
- Paintbrush
- Wooden or stainless steel rolling pin
Step by step
- First, the white clay must be crushed or ground. You can use a rolling pin to do this, but you should make sure that the clay is powdery at the end. This step can be a bit time-consuming as the clay is dry and hard and you should grind it very well.
- After you have pulverized your clay you need to weigh out 1000g of it in a plastic container. This means that this is 1000 grams of ground white clay for each of the colors of coloring oxides you have chosen.
- Once you have poured the 1000 grams of clay into each container, you must weigh out 100 grams of each coloring oxide and place each in the plastic container provided for that color, which also contains the ground clay.
- Then add a little water, a little less than half the size of a small disposable cup, to each container.
- Mix well.
- Now weigh out 100 grams of flux for each container and add this amount to each container. Then stir very well.
- Eventually, you will see the mixtures thicken in texture as well as take on color. And that’s it, your engobes are ready for use.
The amounts given make a mixture for approximately a 7cm wide x 12cm high glass, which is approximately 400ml. So if you want to make more engobe, you’ll need to add more of each ingredient accordingly.