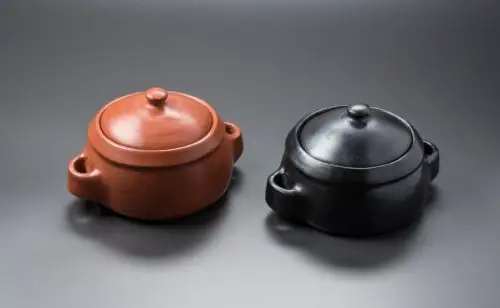
Did you know that the only way to make ceramics is to model them with your own hands? You can also use plaster molds to make countless identical pieces.
Table of Contents
Ceramic molds in plaster
Why plaster? Because when dry, it has a porous structure that aids in the drying process of the clay. The plaster will soak up the wet rests of the mix, eliminating imperfections like bubbles and holes.
However, these molds are intended exclusively for the casting technique. Here slip is poured into a mold. This is what the mixture of water and clay that is mixed into a viscous liquid is called.
This technique is very simple because it basically consists of pouring the slip into the mold, leaving it to dry for a few minutes and then removing the mold to continue shaping the piece.
For artisans of antiquity, the use of molds was not very common, since a product that was not 100% handmade did not have the same retail value.
Over the years, however, this technique has become more and more popular as the ceramic market has grown and with it the need for practicality. Of course, one must not forget that the form is also considered a craft.
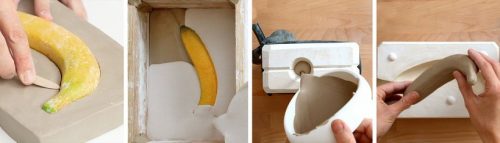
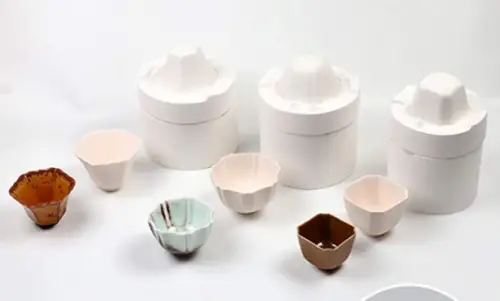
These molds basically consist of two pieces of plaster of the same size, in the center of which is the figure to be molded and above which a nozzle is placed to pour the slip when the two pieces are already joined and held together well with a rubber.
You can mold any type of object, a circle, a vase, a table decoration, whatever you can think of. All you need is your imagination.
How to make plaster molds for pottery
To make a plaster mold to make your ceramic pieces, all of which have the same shape, you will need a certain amount of materials and you must follow the steps below.
Materials:
- The object you want to mold
- 4 wooden panels that are higher than the object to be shaped
- playdough or clay
- plaster
- water
- plastic container
- Vaseline
- knife
Process
- To create the shape, you must start from an already existing object. Select the object you want to mold but remember it must be clean, pristine and well polished for the mold and therefore your future pieces to look the same.
- Spread Vaseline all over the object. This will act as a release agent so it won’t stick to the plaster when we get to this step.
- On a table, make a square base of modeling clay or clay that is larger than the object. When the square is at least 1cm thick, place the item squarely in the center and add more clay to cover the center. The other half should be uncovered as we will be making a two-part plaster mold. Note that at the bottom of the piece you should use the plasticine to form a kind of nozzle up and down that, when the mold is complete, will form the space into which the slip will be poured.
- Surround this square of plasticine with the 4 wooden panels, which should be at least 5 cm higher than the plasticine, as if they were walls. They must be attached to each other very well so that the plaster does not peel off.
- Now, to start the plaster, you should mix the plaster in the plastic container with water until it has a slightly thick consistency and will not bubble so it will not damage your mold.
- Once you’ve prepared the space of the object with the plasticine and walls, you can start pouring the plaster mixture over the piece until it’s completely covered, leaving at least 2cm of plaster over the object. To prevent bubbles from forming when pouring the plaster mixture, you can put your hand in the middle to, as it were, knead the mixture before it falls onto the workpiece.
- Let the plaster dry so you can remove the walls.
- Now they can turn the mold upside down and remove the clay base they made at the beginning, leaving only the nozzle to finish the other part of the mold.
- Clean and polish the plaster with a knife and gently scrape the places where there are imperfections like lumps to make it smooth.
- Using the same knife, poke small circular holes in the plaster to help fit the two parts of the mold when using.
- Without turning the mold over or taking the object off-center, reposition the wooden walls around the object and spread the plaster mix over the other half of the mold and the object again, so that the piece is completely covered and again only 2 cm plaster remains.
- Finally, when the plaster is dry, you can remove the walls and the kneading nozzle . Then you can polish both parts of the mold with a knife and a wet sponge to make it perfect.
Where to buy molds for ceramics
If you don’t want to make a mold yourself, you can also buy one.
WellieSTR Style 6 bowls small ceramic molds
- Price: $65
- Buying Sites: Amazon
- Gypsum is environmentally friendly
These are very practical and easy to use molds. In addition, everyone from children to experts can use them to create wonderful ceramic works. There are 6 different types of bowl shapes you can make, so perfect if you want variety!
12cm spherical shape

- Price: $34
- Shopping site: Marphil
- Has a perfect finish
The red joints, with which he must optimally adapt to the shape so that the piece is well formed, are very useful.
Silicone Ceramic Molds
Silicone molds are another great way to get identical pieces, but with the difference that they’re ideal for making pieces out of cold porcelain or polymer clay, rather than slip .
There are molds for small pieces, but also medium-sized molds perfect for making pots or ashtrays.
Silicone molds for cylindrical pots, 3 pieces for epoxy resin

- Price: $24
- Buying Sites: Amazon
- Very easy to use
- Can be used to craft flowerpots, ashtrays, penholders and many other items.
Thanks to its flexible material, the mold can be easily cleaned after use and is ideal for use with various materials such as polymer clay, cement, resin, cold-paste porcelain, etc.
They are so good and interesting that thanks to their ease of use and spectacular designs, the vast majority of users are willing to buy more molds to create new pieces.
21 silicone molds for decoration

- Price: $9
- Buying Sites: Amazon
- The roses are very finely detailed
The set includes 21 different sizes of roses with different types of petals and shapes, which can help you decorate unique pieces.
To end this blog, we hope we have helped you discover a new way to make your artwork. Maybe you’re new to clay modeling and you’ve learned a lot more about this great world of ceramics .